

Indiana Jones and the Great Circle walkthrough: how to use this route through the whole campaign
The first time you boot Indiana Jones and the Great Circle, the game is quiet about what it actually expects from you. The opening teaches whip combat and stealth in a single short sequence, then it drops you into a Vatican-adjacent mystery and never slows down. This walkthrough is built for a player who wants to finish the main story on a first run without missing the systems that the campaign quietly rewards: disguises, field notes, the Adventure Book, and the small side encounters that feed both XP and unlock progression.
The route below is written for a normal-difficulty first playthrough on a fresh save, and it works as a reference on higher difficulties as well. Each chapter section lists the order of the major set pieces, where the optional content sits, and which fights or puzzles can quietly wreck your run if you walk in unprepared. Treat the chapter order as a linear backbone, and treat the optional encounters as the parts of the map that quietly make the next boss feel easier.
Before you start, take ten minutes to set up controls, brightness, and the camera. The game uses a first-person perspective with a third-person cut-scene camera, and the shoulder swap button sits on the face button most people press by accident. Rebind it to a back paddle or a shoulder click so you are not fumbling during the dual-whip finishing moves in the late game. Save often: the game autosaves generously, but the checkpoints before stealth sections are spaced out.
How the campaign is actually structured
The main story is split into a short intro tutorial, four full chapters, and an epilogue. Each chapter takes place in a new country and introduces one or two core gameplay systems on top of the standard whip, fists, and gun kit. The pacing is closer to a 1990s LucasArts adventure game with modern traversal layered on top: long stretches of walking, talking, reading field notes, and solving environmental puzzles, broken up by stealth corridors and set-piece fights.
The role of the Adventure Book and field notes
The Adventure Book is your in-game menu for every collectible, side quest, and optional encounter you have triggered. It is not a passive checklist. When you pick up a new field note, photograph, or rumor, the relevant page lights up and the game quietly primes a small encounter. If you ignore the Adventure Book for a few hours, the game will not stop you, but you will arrive at several mid-chapter bosses under-leveled and without the disguise or item that would have made the encounter trivial. Make a habit of opening it whenever you unlock a new region or finish a cut-scene.
Field notes are a separate system. They are the small papers, books, telegrams, and chalk marks scattered through each level. Reading a field note usually gives you a dialogue option, an objective marker, or a hint that unlocks a shortcut. They are also the main currency for unlocking the upper tiers of the skill tree, so reading them is not optional if you care about build variety.
Disguises, health, and the weight system
Disguises in this game are not cosmetic. Putting on a uniform or a set of coveralls lets you walk through guarded areas without raising suspicion, but it also locks you out of your whip until you take it off. Health is a fixed bar that does not regenerate on its own. Bandages, liquor bottles, and certain food items restore chunks of it. The weight system is the one that trips people up: if you carry too much loot at once, your run speed drops and your stamina recovers more slowly. Drop the heavy golden idols at the nearest suitcase and pick them up on the way out.
Skill tree, perks, and what to unlock first
The skill tree is small enough to finish in a single playthrough if you invest carefully. On a first run, the priority is the upper-hand combat perks, the stamina upgrade that extends your dodge window, and the disguise-related perks that let you take a hit without losing your cover. Save the photo and field-note perks for a second pass if you do not main a completionist style. The photography perks are powerful, but only after you understand which photos are worth the film.
Chapter 1: Marshall College and the Vatican
The first chapter is split between the Marshall College intro and the Vatican investigation. It is the shortest chapter in the game, but it teaches the verbs the rest of the campaign assumes you know: whip-crack to disarm, fist combos to stagger, crouch to enter stealth, and the two-button context action for interacting with the environment.
Marshall College: the opening hours
The Marshall College segment is mostly set-up. You walk the campus, talk to Marcus, and pick up your first field notes. Do not skip the dialogue here even if you have seen the trailers. Marcus gives you the camera, and the camera unlocks a photo objective that pays off in the late game. The first real encounter is a fist fight in the dormitory courtyard. Keep your block up, wait for the enemy to swing, and punish with a two-hit combo. Do not waste stamina on a heavy attack at this stage.
After the courtyard, the game funnels you into a short stealth section through the college cellars. Use bottles to distract guards, crouch behind crates, and never try to fight a guard with a gun in the open until you have the disarm perk. The chapter ends with a chase through the snow and a scripted escape that you cannot die in, but you can fail to grab two optional collectibles if you mash through the cut-scene button.
Vatican City: infiltration, disguise, and the first real puzzle
The Vatican is the first full-size open area. Your job is to reach the dig site, recover the stolen relic, and survive the inquisition. Three things make or break this section:
- Get the priest disguise as soon as you enter the basilica courtyard. You will see a side door to the left of the main entrance where a priest is changing. Crouch, take him out, and change. The disguise lets you walk through the public halls without being tackled.
- Do not fight the fascist officers in the courtyard. There are at least four, and they hit hard. Loop around the cloister to the right, climb the scaffolding, and drop into the maintenance tunnels instead.
- Save the strong liquor bottle for the boss. You will need a full heal, and the only vendor in the area sells out early.
The first real puzzle is a relief-wheel sequence in the catacombs. Each wheel rotates a section of the wall, and the correct order is read off the frescoes in the upstairs gallery. Take a photo of the frescoes with the camera, then refer to them in the catacombs. The puzzle is not timed, but the lighting is dim and the wheels are heavy. Switch the brightness up in the options if you are playing on a handheld or a small monitor.
Vatican boss: the catacomb guardian
The first chapter boss is a large enemy with a mace in the deepest room of the catacombs. He telegraphs every heavy swing with a wind-up that takes about a second. Block the heavy swing, dodge the overhead slam, and punish with a two-hit whip-crack to the back. He summons two weaker enemies at half health. Ignore them and finish the boss first: the adds die automatically when he goes down. The cut-scene after the fight unlocks the whip upgrade that lets you disarm gunners, which is the single most important combat tool in the game.
Chapter 2: Gizah and the Great Sphinx
Chapter 2 moves the campaign to Egypt and introduces the longest open zone in the game: the Gizah plateau, the workers’ village, and the interior of the Great Sphinx. It is also where the game starts to trust you with multi-stage puzzles that span several map screens.
Plateau traversal and the camel system
The plateau is large enough that walking everywhere is a mistake. You unlock a camel mount partway through the chapter, and it is worth the time to learn the camera and the dismount button before you try any of the side quests. The camel is faster than running, but it cannot climb the stepped sections of the plateau. There are four stables on the map, and each one is a fast-travel point once you have unlocked it. Fast travel is not free: it costs a small amount of local currency, and the currency is finite in this chapter, so plan your route.
Key traversal rules:
- Use the camel for the long flat stretches between the workers’ village, the sphinx, and the three dig sites.
- On foot for the tombs and the cliffside paths. The camel cannot fit and the camera will fight you.
- Save the horses in the village for the chase sequence near the end of the chapter. They handle the jumps better than the camel.
Field notes, photos, and the Gizah mystery chain
The Gizah chapter has a long chain of side mysteries that all feed into a single late-game puzzle. Pick up every field note you can find in the workers’ village, photograph every numbered stone, and read the telegrams in the British expedition tent. The Adventure Book will mark them as part of a single chain, and the chain does not resolve until you have at least six of the eight items. If you finish the chapter with fewer than six, the chain stalls and you will need to replay the area on free roam to pick up the missing ones.
The interior of the Great Sphinx
The Sphinx interior is a long, linear dungeon with three puzzle rooms and two stealth corridors. The puzzle rooms use a combination of pressure plates, light beams, and movable statues. There is a pattern to each room, and the pattern is hinted at in the wall carvings. Take a photo of the carvings before you enter the puzzle room so you do not have to backtrack.
Stealth corridor 1 is short: three guards, one patrol, and a breakable wall that shortens the run. Stealth corridor 2 is longer and ends in a scripted QTE against a knife fighter. The trick is to release the stick as soon as the indicator reaches the sweet spot. Hold it too long and you will take a hit.
Gizah boss: the tomb raider
The Gizah chapter boss is a fast, dual-wielding enemy in the deepest chamber of the Sphinx. He opens with a flurry that drains your stamina if you try to block. The correct response is to dodge backward twice, wait for the heavy overhead, and parry it. The parry opens him up for a whip-crack to the back. He repeats the pattern twice and then switches to a gun. When the gun comes out, disarm with the upgraded whip-crack, not with a melee strike. The fight is over in under a minute if you play the pattern, and it can take five if you try to brute-force it.
Chapter 3: Shanghai and the flooded temple
Chapter 3 is the most mechanically dense chapter in the game. It introduces boat traversal, underwater stealth, and a moral choice that splits the late-game dialogue. It is also the chapter where the game stops telling you when to save, so bind a save quickslot to the d-pad before you start.
The Shanghai docks and the club infiltration
The opening section is set in the Shanghai dockyards. You start with a forged pass, and the pass gets you into the dockside warehouse. From there, you have two ways into the nightclub: the back alley, which is a stealth section, and the front door, which is a disguise section. The disguise route requires the worker uniform you can steal from the laundry room. The stealth route requires the bottle distraction you can pick up in the alley. Both routes converge in the same back room.
The nightclub itself is a social stealth section. You cannot fight in the club without breaking cover, and breaking cover triggers a timed sequence where the club clears out. Walk slowly, stay near the walls, and use the side rooms to bypass the dance floor. The VIP room in the back holds the chapter’s first major item, and the bartender has a side quest that rewards a disguise useful for the next chapter.
The flooded temple
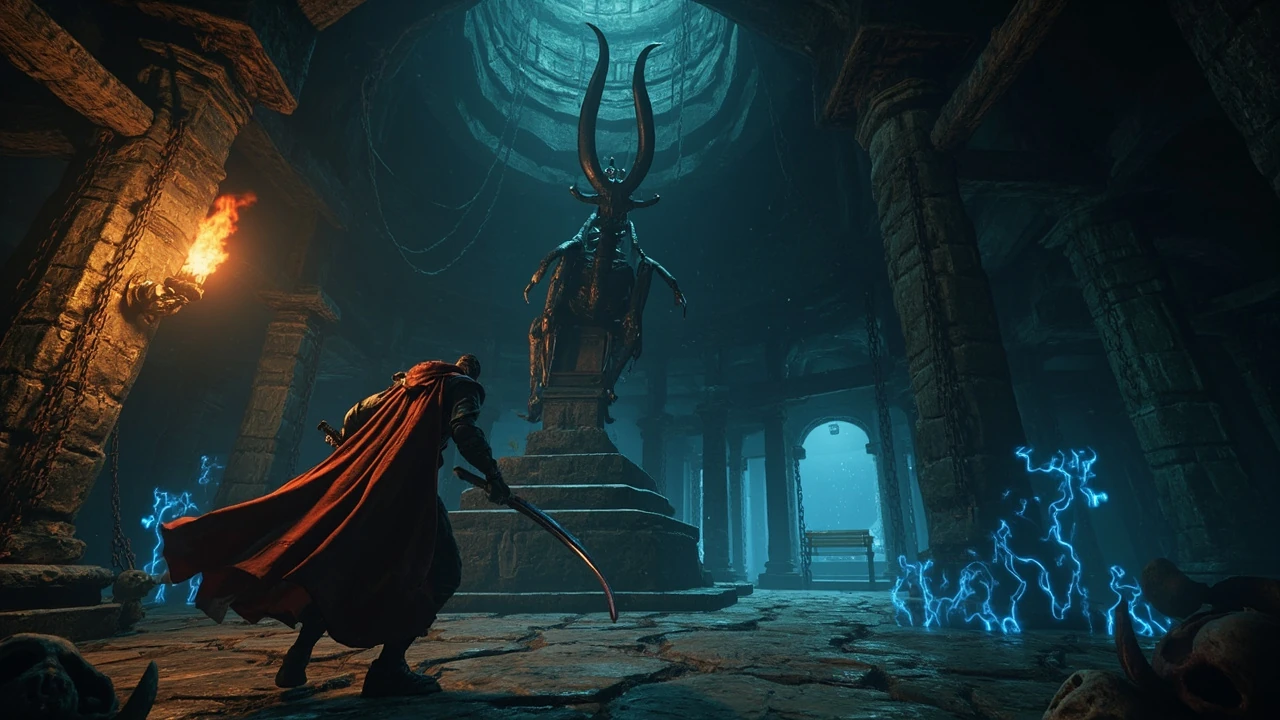
The flooded temple is the chapter’s centerpiece. It is a large, multi-level dungeon with three distinct zones: the dry upper halls, the partially flooded middle, and the fully submerged lower section. The middle zone requires the rebreather you pick up in the workers’ area. The lower section requires both the rebreather and the lantern upgrade from Gizah. If you do not have the lantern upgrade, the lower section is a blind walk through pitch black, and the trap plates are impossible to see.
The puzzle in the flooded temple is a four-statue alignment sequence. Each statue rotates a section of the floor, and the correct alignment is given in a series of stone tablets in the upper hall. Take photos of all four tablets before you go down. The order is: lion, falcon, jackal, ibis. If you solve it in the wrong order, the floor floods and you have to backtrack through the underwater section.
Underwater stealth and the shark room
There is one underwater stealth section that is famous for tripping people up. You swim through a flooded corridor with two sharks. The sharks patrol a fixed loop, and the loop has a safe window of about three seconds. Wait at the entry, watch the shark turn, and swim through during the turn. Do not try to swim over the shark. The collision is lethal.
Shanghai boss: the gunboat duel
The Shanghai chapter boss is a ship-to-ship gun duel on a sampan in the flooded section of the docks. You control a mounted machine gun, and you have to shoot out the engine, the bridge, and the magazine of the enemy gunboat. The trick is to lead your shots. The enemy boat moves left to right at a constant speed, and the bullets travel slowly at the start of the chapter. Aim one boat-width ahead of the engine and adjust the lead as the distance closes. The magazine is the hardest target. It is small, it is on the starboard side, and it only appears briefly when the boat turns.
Chapter 4: the Himalayas and the final ascent
The final chapter is a vertical climb up a Himalayan monastery that has been fortified by the cult. It introduces the rope-and-climbing system, the high-altitude stealth kit, and the longest continuous fight in the game. It is also the chapter where the moral choice from Shanghai pays off, so make sure you finished the Shanghai side quests.
The rope system and the cliff faces
The rope system is a single-button mechanic, but it has a stamina cost that scales with the slope. On a near-vertical face, the stamina drain is severe. Take it slow, rest on the small ledges, and never try to climb straight up a wet face. The game marks wet faces with a darker texture, and they always have a detour. If you find yourself on a wet face with no visible detour, you are looking at a trap, not a puzzle.
Monastery infiltration and the high-altitude disguise
The monastery is a multi-level fortress with a strict uniform check at the gate. The monk disguise is the only way through the gate without a fight, and the disguise is earned by completing the side quest in the lower village. The side quest is not marked on the main map. You have to talk to the elder in the central yurt, and the elder will only speak to you after you have read at least three field notes in the area. The disguise is worth the time: it lets you walk through the inner courtyard, the refectory, and the scriptorium without a single stealth takedown.
The final ascent: puzzles, traps, and the last field note
The final ascent is a long, linear climb with three puzzle rooms and two trap corridors. The puzzle rooms use the same pressure-plate and light-beam system from the Sphinx, but the rooms are larger and the patterns are longer. The trap corridors use a new mechanic: the floor collapses in sections, and you have to time your run. The trick is to listen for the creak. The creak is louder on the sections that are about to fall.
The last field note is in a small chapel halfway up the ascent. It is the only field note in the chapter that is not part of a side chain. Reading it unlocks a dialogue option with the final boss that changes the epilogue.
Final boss: the high priest
The final boss is a two-phase fight against the high priest on the top of the monastery. Phase one is a sword duel. He telegraphs every attack with a distinct sound. Block the heavy, dodge the light, parry the overhead. The parry opens him up for a whip-crack to the back, same as every other boss in the game. Phase two starts when he calls down a storm. The arena becomes slippery, the lightning reduces your visibility, and the priest gains a gun. The gun is the danger. The slip mechanic means a missed dodge can throw you off the platform. Stick to the high ground on the right side of the arena, wait for the gun shot, and disarm with the whip. The fight ends with a quick-time event that depends on the Shanghai choice. If you saved the bartender in Shanghai, the QTE is shorter. If you did not, you take a scripted hit.
Epilogue and post-campaign
The epilogue is a short, linear set of cut-scenes that wrap up the story. It is not optional, and it is not a free-roam zone. For additional context, After the credits, the game drops you back into the last save before the final boss with the full skill tree and all the chapter travel points unlocked. This is the post-game state, and it is where you go back to clean up the optional content.
What carries over and what does not
The following carries over from the main campaign into post-game:
- All skill tree unlocks and perk points.
- All disguises, weapons, and items in the player’s inventory at the moment of the final save.
- All Adventure Book entries, including the optional chains that you finished.
- All field notes, photos, and telegrams.
The following does not carry over:
- The moral choice from Shanghai. It is locked at the start of the final boss.
- The disguise from the monastery. The post-game zone is the monastery interior, and the disguise is no longer useful.
- The boat from Shanghai. The post-game does not include the docks.
The New Game Plus question
New Game Plus is not a separate mode in this game. There is no carry-over of loot, skills, or disguises into a fresh save. The closest thing to a replay mode is the chapter select, which lets you replay any chapter with your current save state. The chapter select is the right tool if you want to clean up a specific optional chain without replaying the whole game.
Combat, stealth, and traversal: the three systems that decide your run
The campaign is built on three interlocking systems. Combat is the loud option. Stealth is the quiet option. Traversal is the glue that lets you choose between them. The strongest runs use traversal to set up the encounter, not brute-force combat or sneak through every room.
Combat priorities for a first run
On a first run, the combat priority list is short and stable. Block first, dodge second, attack third. The block is the most forgiving tool. It costs stamina, but it prevents chip damage and sets up the parry. The dodge is a stamina-intensive tool that opens up a long attack window, but it is unsafe against multiple enemies. The attack is the lowest priority because every enemy in the game can be punished with a two-hit combo and a whip-crack, and the two-hit combo is the same for almost every enemy type.
The priority list for weapon use is:
- Whip for disarms and back-line control. The whip is the only weapon that can disarm a gunner at range, and it is the only weapon that can pull a shielded enemy off his stance.
- Fists for stagger and stamina drain. Fists are fast, they cost no ammo, and they build the stagger meter on shielded enemies.
- Gun for emergencies only. The gun is loud, it alerts every guard in the area, and it uses scarce ammo. Save it for scripted QTE moments and for the few enemies that cannot be disarmed.
Stealth priorities for a first run
Stealth is the system that punishes carelessness. The detection meter is split into a visual cone, a sound radius, and a suspicion bar. The visual cone is the most important: if you stay out of the cone, you will not be detected. The sound radius is set by your movement speed. Crouch-walking produces no sound. Running produces a large sound radius. Bottles and thrown objects produce a fixed sound radius that can be used to lure guards.
The suspicion bar fills when a guard sees something out of place: a body, an open door, a missing item. The bar fills faster if the guard is already alert. The fastest way to fail a stealth section is to leave a body in a well-lit corridor. Hide the bodies in the dark corners and close the doors behind you.
Traversal priorities for a first run
Traversal is the system that lets you choose between combat and stealth. The traversal tools in the game are: crouch, mantle, rope, ladder, and the small handful of vehicles (camel, horse, boat). The most important traversal tool is the mantle. Mantling is silent, it is fast, and it lets you bypass almost every stealth section if you know the right route. The second most important is the rope. The rope is loud, but it lets you reach areas that the camel and the horse cannot, and the upper areas are almost always empty of guards.
Puzzle logic and the language of the game
Every puzzle in the game is built on the same three-part structure: a visual clue in one room, a mechanical input in the next room, and a feedback loop in the third room. The visual clue is almost always a carving, a fresco, a set of statues, or a field note. The mechanical input is a wheel, a pressure plate, a movable statue, or a combination of the three. The feedback loop is a sound, a light, or a door that opens.
The four puzzle families
The puzzles in the game fall into four families. The first family is the alignment family: rotate the statues or the wheels until the pattern on the wall matches the pattern in the field note. The second family is the order family: press the plates or move the statues in the order given by the tablets. The third family is the weight family: place the right object on the right plate. The fourth family is the light family: redirect the light beam to the right receptor.
How to read a puzzle room
When you enter a puzzle room, take a moment to read the room before you touch anything. The clue is almost always in the same room as the input. The feedback loop is almost always in the next room or the same room. If the clue is missing, you probably missed a field note. If the input is missing, you probably need a disguise or a tool. If the feedback loop is missing, you are in the wrong room.
Common puzzle mistakes and how to avoid them
The most common puzzle mistake is to assume the puzzle is timed. None of the puzzles in the main campaign are timed. The timer is on the stealth section that follows, not on the puzzle itself. The second most common mistake is to assume the puzzle is randomized. The puzzles are not randomized. The pattern is fixed. The third most common mistake is to assume the puzzle requires an item you do not have. The puzzles in the main campaign never require an item from a later chapter. If you think you are missing an item, you are probably missing a field note.
Field notes, photos, and the Adventure Book: a deeper look
The Adventure Book is the closest thing the game has to a quest log, and it is also the only way to track the optional content. The book is split into chapters, and each chapter has a set of main entries and a set of optional entries. The main entries are the ones that advance the story. The optional entries are the ones that feed the side chains, the side mysteries, and the upgrade quests.
How the optional chains work
Each chapter has two to four optional chains. A chain is a set of field notes, photos, telegrams, and small encounters that all feed a single side quest. The chain starts when you pick up the first item, and the chain ends when you resolve the last item. The chain does not always resolve on its own. Some chains require you to return to a specific NPC, and the NPC is only available during a specific time of day. The game does not have a real time-of-day system, but the NPC’s location and dialogue change as you progress through the chapter.
What the field notes actually give you
Field notes give you four things: skill points, dialogue options, item unlocks, and shortcut access. The skill points are the most important. There are not enough skill points in the main campaign to unlock the whole tree, so every field note is a real choice. The dialogue options are the most underrated. Several late-game encounters have a dialogue option that bypasses the fight entirely, and the option is only available if you read the right field note. The item unlocks are the most obvious. The shortcut access is the most useful. Several optional chains unlock a shortcut that saves five to ten minutes of traversal.
Best settings, controls, and accessibility on a first run
The game has a wide range of settings, and several of them are not on by default. The first thing to do is to open the options and rebind the shoulder swap to a back paddle or a shoulder click. The second thing to do is to turn on the high-contrast mode for the stealth sections. The high-contrast mode makes the visual cones visible at all times, and it is a major quality-of-life improvement for players who have trouble reading the cone against a busy background.
Recommended settings table
The table below is a reasonable baseline for a first playthrough on a standard controller. It is not the only correct setup, but it is the setup that the developers tuned the game around.
| Setting | Recommended value | Why it matters |
|---|---|---|
| Camera sensitivity | Medium | Faster than the default, slow enough to keep the whip aim on target. |
| High-contrast stealth | On | Makes the guard cones visible against any background. |
| Brightness | +1 to +2 | The catacombs and the Sphinx interior are darker than the rest of the game. |
| Subtitle size | Large | Several dialogue options are only available in the cut-scenes, and the small default size is hard to read. |
| Motion blur | Off | The whip aim is harder to control with motion blur on. |
| Aim assist | On | The whip aim has a generous assist cone that is easy to miss without it. |
| Field-of-view | Default | The default is tuned for the third-person cut-scene camera. |
Chapter loadout comparison
The table below shows the practical differences in how each main chapter expects you to spend your resources. It is a quick read for players who want to plan a first-run loadout without re-reading every section above.
| Chapter | Primary verb | Key unlock going in | Biggest first-run mistake |
|---|---|---|---|
| 1 – Marshall / Vatican | Learn the verbs | Whip disarm upgrade (after Vatican boss) | Mashing through the snow chase cut-scene and missing the optional collectibles. |
| 2 – Gizah / Sphinx | Traverse and chain | Camel fast travel, lantern upgrade | Leaving the Gizah mystery chain with fewer than six of eight items. |
| 3 – Shanghai | Social stealth and diving | Rebreather, bartender disguise | Diving into the lower temple without the lantern upgrade from Gizah. |
| 4 – Himalayas | Climb and parry | Monk disguise, full whip kit | Skipping the lower-village side quest and losing the gate disguise. |
Controller layout for combat
The default layout is fine, but two changes make a real difference. The first is to swap the block and the dodge buttons. The default has the block on the bumper and the dodge on the trigger. Swapping them puts the dodge on the bumper, which is faster to press during a combo. The second is to bind the save quickslot to the d-pad. The game autosaves, but the autosaves are spaced out, and a manual save before a stealth section is the cheapest insurance in the game.
Common failure modes and how to fix them
Most first-run failures fall into a small set of patterns. The patterns are predictable, and the fixes are stable across the whole campaign.
Pattern 1: the stealth reset
The stealth reset is the most common failure. You enter a stealth section, you take out the first guard, and the second guard spots the body. The fix is to drag the body into the dark corner before you take out the second guard. The dark corners are always marked by a small lamp or a candle. If the lamp is out, the corner is not dark enough.
Pattern 2: the stamina drain
The stamina drain is the second most common failure. You enter a fight, you spam the dodge, and you run out of stamina before the enemy finishes his combo. The fix is to block the light attacks and only dodge the heavy attacks. The light attacks cost less stamina to block than to dodge, and they do less chip damage.
Pattern 3: the puzzle loop
The puzzle loop is the third most common failure. You enter a puzzle room, you solve the puzzle, the door does not open, and you solve it again in a different order. The fix is to check the feedback loop. If the feedback loop is a sound, the door is not in the puzzle room. If the feedback loop is a light, the door is in the same room. If the feedback loop is a door, you are in the right room and the puzzle is wrong.
Pattern 4: the boss timer
The boss timer is the fourth most common failure. You enter a boss fight, you play the pattern, and you die in the second phase. The fix is to save the heal for the second phase. The first phase is always easier than the second, and the heal is always more useful in the second.
Pattern 5: the chapter exit
The chapter exit is the fifth most common failure. You finish the chapter objective, the cut-scene plays, and you realize that you missed three field notes in the back of the map. The fix is to open the Adventure Book before you trigger the chapter exit. The book will list the optional chains that are still open, and the chains are usually close to the exit point.
Frequently asked questions
How long is the main campaign in Indiana Jones and the Great Circle?
The main campaign is roughly 14 to 18 hours on a first run at normal difficulty, depending on how much optional content you pick up. A focused run that skips the side chains and the optional encounters is closer to 10 hours. A completionist run that picks up every field note, photo, and disguise is closer to 22 hours.
Can I finish the game without picking up the field notes?
Yes. The main campaign is fully completable without reading a single field note, but several late-game encounters are noticeably harder if you skip them. The dialogue bypasses, the skill points, and the disguise unlocks are the main reason to pick them up on a first run.
Do I have to play the previous chapter to start the next one?
No. The chapters are gated by story triggers, not by skill. You can finish the Vatican chapter, skip the Gizah chapter, and start the Shanghai chapter if you want, but the Shanghai chapter assumes you have the lantern upgrade from Gizah. Without it, the lower section of the flooded temple is a blind walk.
What is the best difficulty for a first run?
Normal is the right choice for a first run. The harder difficulties increase the enemy damage and the detection rate, but they do not change the puzzles. The puzzles are the same on every difficulty, and the harder difficulties do not add any new content. Hard is a good choice for a second run if you want to replay the campaign with the full skill tree.
Is there a point of no return in the campaign?
There is a soft point of no return at the start of the final boss. Once you trigger the cut-scene that starts the boss fight, you cannot go back to the open world. The chapter exit is marked on the map before the cut-scene, and the Adventure Book will warn you if you have any open chains in the area.
Do the disguises carry over into the next chapter?
No. Each chapter starts with a fresh disguise set, and the previous chapter’s disguises are stored in a locker that you can access from the post-game state. The disguises are useful inside their own chapter, and they are not useful in the next chapter.
What happens if I fail the Shanghai moral choice?
The moral choice in Shanghai is the only choice in the game with a mechanical effect on the final boss. If you choose to save the bartender, the final boss QTE is shorter and the epilogue has an extra scene. If you choose to leave the bartender, the QTE is longer and the epilogue is shorter. The choice is locked at the start of the final boss, and it cannot be changed in the post-game state.
Can I replay a specific chapter without starting a new game?
Yes. The chapter select is available from the main menu after you finish the main campaign. The chapter select uses your current save state, which means that you keep your skill tree, your items, and your disguises. The chapter select is the right tool for cleaning up a specific optional chain without replaying the whole game.
Are there any missable achievements or trophies in the main campaign?
There are a small number of missable entries in the Adventure Book, but no missable achievements or trophies. The achievement for finishing the game is awarded at the end of the epilogue, and the achievement for finishing the game on hard is awarded on a second run. The missable Adventure Book entries are the optional chains, and they are listed in the book before the chapter exit.
Where can I check the verified release and platform details for the game?
The campaign structure and the systems in this walkthrough are based on the public release that has been confirmed for the platforms listed on the official product page. The Indiana Jones and the Great Circle page on English Wikipedia tracks the platform history and the chapter list, and the PlayStation 5 release confirmation report from The Verge is the most specific source for the later platform rollout. For the latest system requirements, storefront pages, and any platform-specific updates, the official publisher and platform-holder pages are the only sources that will not drift.
Leave a Reply