
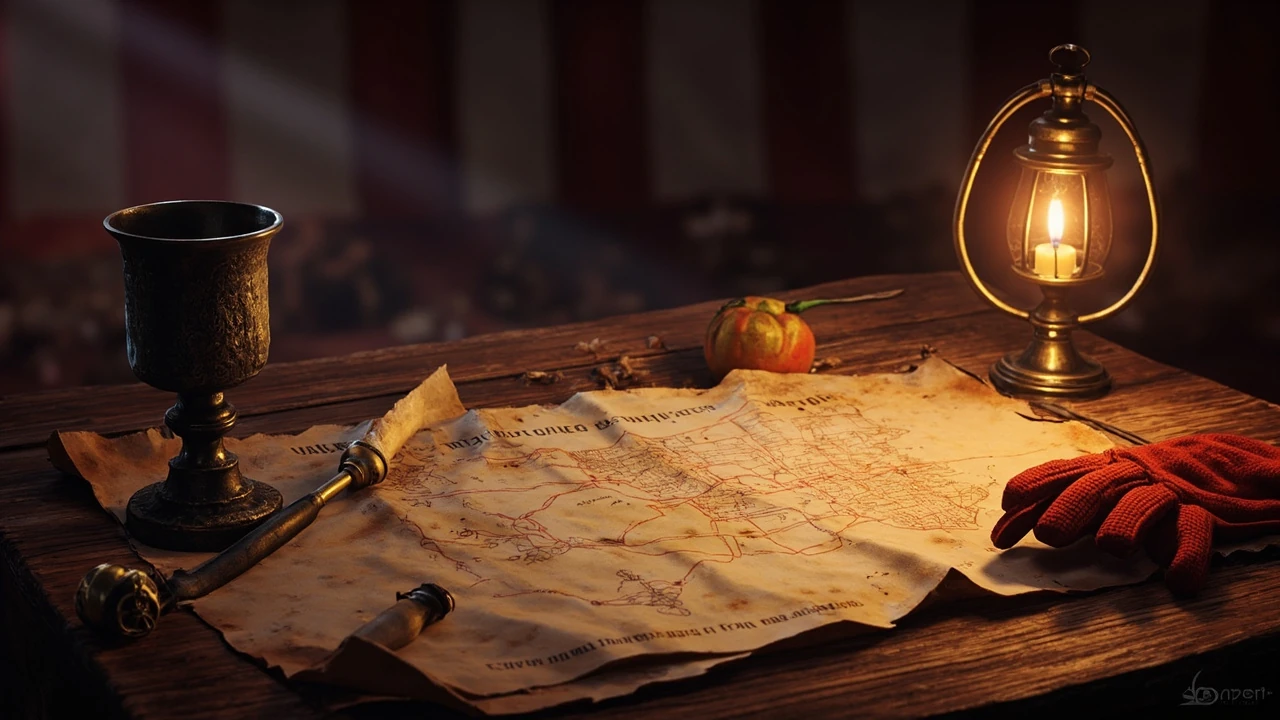
Dribbles the Clown parts in Baldur’s Gate 3: full location guide
Scattered across Rivington, the Lower City, and the sewers below the Temple of Bhaal, the seven dribbles the clown parts form one of Act 3’s strangest fetch quests. The performer you meet at the Circus of the Last Days is already gone, chopped up by Absolute cultists who needed his body for a resurrection. What remains has been dumped into basements, locked houses, and a sewer ambush, and Lucretious the ringmaster wants every piece back.
This guide covers every confirmed location, the order the quest actually opens, the lockpicks and basement hatches that gate each piece, and the reward that makes the errand worthwhile. It also flags the single part that sits behind a forced story fight so you know when to long rest and reload your spell slots. Every step below works on a normal Act 3 party using the in-game waypoint network, with no out-of-bounds tricks or datamining required.
The quest trigger is on a table in the Circus of the Last Days itself, so it is hard to miss. The first section explains the opening, then we go part by part, and the closing FAQ covers the most common stuck points players hit in current patches.
How the quest starts and what you are actually doing
Enter the Circus of the Last Days in western Rivington during Act 3 and look for Popper, a Kobold NPC in a fancy hat near the western edge of the show floor. Just to his right, on a low table beside a plate, sits a severed hand. Looting that hand is what opens the Find Dribbles the Clown quest in your journal. The hand is a cultist calling card rather than a forensic match, but the quest tracker treats it as part one and the rest of the body follows the same convention.
The framing is grimly comic. Dribbles was a real performer, the cultists dismembered him after the abduction, and Lucretious wants every piece back so she can reanimate him as a zombie jester for the show. You are not saving Dribbles in any meaningful way, you are running salvage for a ringleader who is mostly irritated that her star attraction got disassembled. Treat it as a fetch list with a punchline, not a rescue.
The reward is the part that makes the running around worth it. Once all dribbles the clown parts are returned, Lucretious hands over the Spellmight Gloves. They let you accept a -5 penalty to a spell attack roll in exchange for adding a d8 of damage to the spell on that roll. For a damage-focused caster, that is one of the cleaner boosts available from a side quest in Act 3, which is part of why this list keeps showing up in build discussions.
Quest overview and recommended route
The body parts sit across Rivington, the Lower City, and the sewers beneath the Temple of Bhaal. None of them require story flags outside of Act 3, with the single exception of the head, which sits behind the Bhaal cult ambush during Orin’s questline. Take a long rest, fill your resources, and bring a healer before that fight, because the encounter includes the Farslayer of Bhaal, a caster who can end a run if his ritual resolves.
| Part | Where to find it | How to reach it | Quest stage |
|---|---|---|---|
| Hand | Circus of the Last Days, on a table near Popper | Walk in, look right of the Kobold with the fancy hat | Starts the quest |
| Torso | Cave under Wyrm’s Crossing, south of the circus | Descend from the Rivington end of the bridge, clear shapeshifting bandits | Part 2 |
| Pelvis | Locked house with a blue door, north of Basilisk Gate | Lockpick the door, loot the body inside | Part 3 |
| Arm | Basement of Peartree’s House, southeast of Sorcerous Sundries | Fast travel to Heapside Strand, two flights of stairs, smash the boarded door, hatch under a suitcase | Part 4 |
| Leg | Basement of Lavernica’s Home, southeast of Bloomridge Park | Warp to Lower City Central Wall, southwest through the wall passage, basement hatch, loot the ritual circle | Part 5 |
| Foot | Basement of Rainforest’s Home, southwest of Lower City Central Wall | Through the big wall gate, west along the street, hatch under the stairs, body beside the altar | Part 6 |
| Head | Sewers below the Temple of Bhaal, on a pile of bodies | Manhole south of Bloomridge Park, north through the pillars, shoot the hanging body to open the gate, clear the ambush, cross the broken pillar bridge | Part 7, locked behind Orin progress |
The order in the table mirrors how the Lower City waypoints unlock as you explore. The torso is closest to the circus, the pelvis, arm, leg, and foot form a rough loop around the central wall, and the head is the only piece that requires real story progress. If you prefer a clockwise sweep rather than the order shown here, the pelvis, arm, leg, and foot are interchangeable in terms of prerequisites.
Dribbles the Clown parts: part by part walkthrough
Part 1: the hand in the Circus of the Last Days
The hand is the entry ticket for the entire quest. Walk into the Circus of the Last Days, head west, and find Popper the Kobold, recognisable by the oversized hat. Just to his right, on a low table beside a plate, sits the severed hand that the quest treats as Dribbles’ hand. Looting it triggers the journal entry and gives you the first item you will eventually hand to Lucretious. There is no combat, no lockpick, and no check required, so you can grab it during a normal circus conversation without derailing anything else in the area.
Part 2: the torso under Wyrm’s Crossing
From the circus, head to the Rivington end of Wyrm’s Crossing and look down. A cave entrance sits directly below the bridge. Inside, a small group of Absolute shapeshifting bandits has to be cleared before the body is lootable, so bring a party that can handle a surprise melee. After the fight, the torso sits on one of the bodies in the cave. This is the easiest piece to combine with the hand, and finishing the two together keeps the journal tidy.
Part 3: the pelvis in the blue door house
Fast travel to the Basilisk Gate waypoint and head north up the street until you see a locked house with a blue door set into a city wall. This is the first real lockpicking check of the quest, and a single rogue or a stack of thieves’ tools is enough. Inside, loot the body to pick up the pelvis. There is no dialogue, no trap, and no extra fight in most runs, so treat it as a quick stop on the way to the next waypoint.
Part 4: the arm in Peartree’s House basement
The arm sits in a hidden basement that is easy to walk past. From the Heapside Strand waypoint, climb two flights of stairs, then turn right up the street. The door to Peartree’s House is boarded up, so smash the planks to get in. Once inside, look for a suitcase on the right; the basement hatch is hidden underneath it. Pull the hatch and head down to find a large body, which holds Dribbles’ arm. Peartree’s House has no other significant loot, so do not expect a side reward for clearing it.
Part 5: the leg in Lavernica’s Home basement
Warp to the Lower City Central Wall waypoint and head southwest through the passage in the wall. Lavernica’s Home will be on your left. Enter, drop through the basement hatch, and look for the body at the centre of a ritual circle. Loot the body for the leg. The ritual circle is purely cosmetic for the quest, but it is worth a quick scan for other story items before you leave.
Part 6: the foot in Rainforest’s Home basement
From Lower City Central Wall, head southeast through the big gate in the wall, then go west along the street. The house is on your left just after a shop called Beehive Goods and Wares. The basement hatch sits under the stairs, and the body is on the right side of an altar in the basement. Loot the body for the foot. Rainforest’s Home is the last Lower City basement before the sewers, so once the foot is in your pack, you have everything you can grab without starting Orin’s questline.
Part 7: the head in the sewers under the Temple of Bhaal
The head is the only piece that requires real preparation. To reach it, you need to enter the sewers south of Bloomridge Park. The cleanest entry is the manhole cover that you reach by fast travelling to the Baldur’s Gate waypoint, going south along the street to a statue, then east up a small staircase and around the corner.
Inside the sewers, head northwest into a room with pillars, then continue north to a gate with bodies hanging in front of it. Shoot one of the bodies to open the gate. Past the gate and down a staircase, you will be ambushed by Bhaal cultists, and the encounter includes the Farslayer of Bhaal, a caster named Ghislev. He must be taken out quickly, because his ritual can wipe your entire party if you let him finish it. A common approach is to use a Scroll of Fly on a strong melee character and send them around the right flank while the rest of the party soaks the ritual damage.
After the ambush is over, cross the broken pillar bridge, turn left through the archway, and find a metal door. Travel down the staircases to the large pile of bodies just north of the Temple of Bhaal fast travel point and loot the head. This is the final dribbles the clown parts entry, and once it is in your pack, you can return to Lucretious and close the quest. The route above also lines up with the general Lower City navigation covered in PC Gamer’s walkthrough of the same quest, which is worth a parallel read for the boss fight alone.
Return to Lucretious and claim the reward
When every part is in your inventory, head back to the Circus of the Last Days and speak to Lucretious. The dialogue option that turns in the body parts is unique, so the quest will not softlock even if you have other circus business to wrap up. After the cutscene, she hands over the Spellmight Gloves. The gloves slot into the glove armour slot and modify a single spell attack per long rest: you take a -5 penalty to the attack roll and add a d8 to the damage on a hit.
For a Sorcerer or Warlock who lives or dies by a small number of high-value spell attacks per fight, the math works out cleanly. For a control caster who mostly throws save-based spells, the gloves are a curiosity rather than a build piece, and you may prefer to leave them in the camp chest for another party member. The reward is not unique to one class, but it is most satisfying on a build that already lives with attack roll variance.
Tips, traps, and common stuck points
Players regularly lose time on three points: missing the basement hatches, forgetting to lockpick the blue door, and walking into the Bhaal ambush with low resources. The list below captures the small checks that prevent each of those from becoming a full restart.
- Smash the boarded door at Peartree’s House, then look for the suitcase on the right; the basement hatch is hidden under it, not against the wall.
- Bring thieves’ tools or a rogue to the blue door north of Basilisk Gate, since the lock is not auto-picked and there is no key on a nearby body.
- Use the Lower City Central Wall waypoint as the hub for parts 5 and 6, then walk between them on foot rather than re-fast travelling to save loading time.
- Before the head, take a long rest, replenish spell slots, and bring at least one healer, because the Farslayer of Bhaal can end the run if you let him complete his ritual.
- Pick up a Scroll of Fly or a similar mobility tool before the sewers, because the Farslayer fight is much easier when one character can ignore the chokepoint.
- Return to Lucretious as a single trip rather than per part, since the dialogue is identical and she does not reward partial progress.
Another frequent stumble is reading the journal stage names as fixed geography. The game marks each piece with a quest description, but the in-world locations are not always obvious from the text, so it is worth glancing at the in-game map between stages rather than trusting the journal alone. The quest tracker will draw a general beam toward the right district, but it will not point at the correct basement hatch.
What changes if you play a different class or party
The quest is class-agnostic on the way in, but a few party compositions make specific parts easier. A rogue with reliable lockpicking removes the only required lock from the pelvis section. A cleric or paladin with a high hit point pool soaks the Farslayer ritual long enough for your damage dealers to clean up. A party with two ranged characters can split aggro on the cultist ambush before the Farslayer starts his channel.
If you are playing a solo honour-style run, the torso cave is the riskiest early part because the shapeshifting bandits can burst a low-level character down before the body is lootable. The head section is much harder solo because the Farslayer encounter is tuned for a full party. Both are still possible with preparation, but expect a few extra attempts rather than a one-pass clear.
For a party built around shove, grease, or web, the Farslayer fight is one of the easier uses of those tools, because the encounter area is small and the caster is a priority target. A well-placed web on the staircase buys you a full round to drop the ritual before it resolves, which is the cleanest counter in any build.
How this quest fits into a broader Act 3 route
Most players pick up the circus, the basement sweep, and the head on the same long session that finishes Orin’s questline, because the sewers are already unlocked by the time you have progressed that far into the main story. If you are still hunting the Nightsong or finishing the House of Hope, it is safer to delay the head section and run the Lower City basements in the meantime, since the basements do not require any story progress and can be cleared in any order.
For a tidy route, the Vault of Vengeance in Crimson Desert guide shows a similar dungeon flow for a different game, and it is a useful comparison if you want to see how quest design handles multi-stage dungeon chains. The two quests are unrelated, but the approach of pacing basement clears between story beats is similar enough to make the cross-reference useful.
For a different Act 3 puzzle that requires lockpicking and basement navigation, the Blue Gate locked gate event walkthrough covers a related moment that benefits from the same preparation habits. Reading both before you set out will sharpen your sense of where the city is hiding things.
Reward value table
| Reward | Slot | Effect | Best users |
|---|---|---|---|
| Spellmight Gloves | Glove armour | On a hit, take -5 to a spell attack roll and add a d8 of damage, once per long rest | Single-target spell attack builds, Sorcerer, Evocation Wizard, Warlock |
| Quest closure | Dialogue | Lucretious reanimates the body as the new circus headliner | Players who want the circus side story resolved |
Frequently asked questions
Do I need to do anything before I can pick up Dribbles’ parts?
You only need to reach Act 3 and enter the Circus of the Last Days for the first six parts. The seventh part, the head, requires real progress into Orin’s questline, because the Bhaal cult ambush that gates the head is part of that main story. As long as the Lower City waypoints are unlocked, you can grab the basements in any order.
Can I find all the Dribbles the clown parts in one trip?
You can find six of the seven parts in a single sweep of Rivington and the Lower City, including the hand, torso, pelvis, arm, leg, and foot. The head is the only one you cannot grab during a casual run because it sits behind the Bhaal ambush in the sewers, so plan a second trip for that piece and a long rest before the encounter.
What is the reward for returning all Dribbles the clown parts?
Lucretious gives you the Spellmight Gloves. The gloves let you accept a -5 penalty to a spell attack roll in exchange for adding a d8 to that spell’s damage on a hit. The effect triggers once per long rest, so treat it as a finisher for your highest-impact single-target spell rather than a passive aura.
Where exactly is the basement hatch in Peartree’s House?
Once you smash the boarded door and enter, walk into the house and look for a suitcase on the right side of the room. The basement hatch is hidden directly under the suitcase, which is why so many players walk past it on the first attempt. Pull the hatch, drop down, and loot the large body for the arm.
Is there a lock on the blue door north of Basilisk Gate?
Yes, the house with the pelvis inside has a blue door with a standard lock. A rogue with thieves’ tools opens it for free, and any class with a stack of tools can pick it on a check. There is no key on a nearby body, so do not waste time searching the street before you pick the lock.
What level should I be for the Farslayer of Bhaal fight?
Most parties clear it comfortably at level 11 or 12, which is the normal Act 3 range by the time you reach the sewers. A level 10 party can still win, but the Farslayer’s ritual is much more punishing with thinner healing pools, so bring a full long rest and at least one dedicated healer before the encounter.
Can I return Dribbles’ parts out of order?
Yes, Lucretious will accept whatever you have in your inventory each time you speak to her, but the dialogue only closes the quest when all seven parts are in your pack. There is no partial reward for a partial set, so do not burn a long rest cycle running back and forth; collect every piece first, then turn them in once.
Does the quest break if I side with the cultists?
The quest is part of the circus side content rather than the main faction story, so the dialogue with Lucretious remains available regardless of your cult choices. The piece locations are also unchanged, and you still need the same waypoint network to reach each basement. The only thing that shifts is which story flags you have on your way to the head.
Are there any missable Dribbles the clown parts if I move past Act 3?
The body parts are static world objects, so they remain lootable for as long as you can return to the Lower City. The only one that becomes harder to access is the head, because the Bhaal ambush is gated by Orin’s questline, and Orin’s questline closes off a few routes near the Temple of Bhaal. As long as you finish Orin before the final story beat, you can still grab the head without a dedicated detour.
What happens to Dribbles after I turn in the parts?
Lucretious reanimates the body and uses the result as the new headliner of the circus. The show goes on with a zombie jester in the same tent, which is the dark punchline the quest has been setting up. The Spellmight Gloves are the practical reward, and the dialogue is the thematic one.
Leave a Reply