
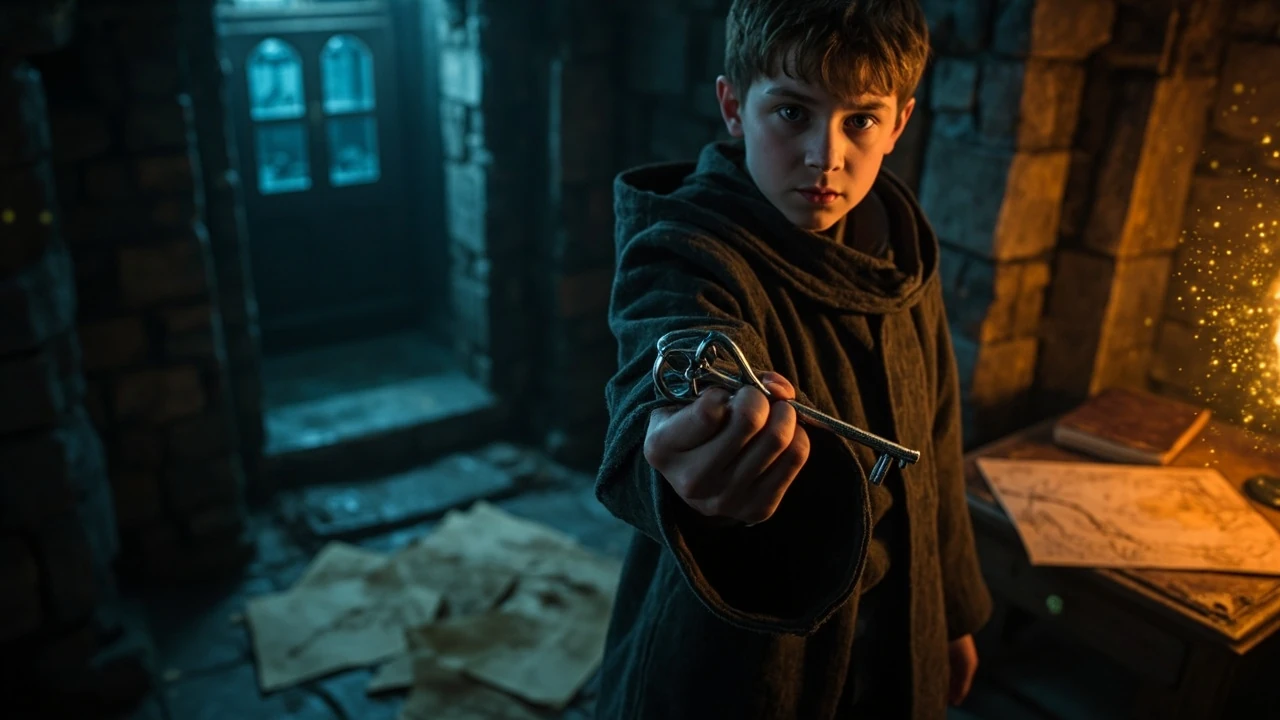
The first time most players hear the term “Daedalian keys” is when they walk past a small cabinet-shaped alcove in the Transfiguration Courtyard and notice the door will not open. That cabinet is one of sixteen small lockers hidden across the castle and the Highlands hamlets in Hogwarts Legacy, and each one accepts a matching ornate silver key. Picking up a key starts a side quest called The Daedalian Keys, and returning a key to the House Chest in the common room of your house turns the set into a real reward rather than a curiosity.
This guide focuses on the parts of the quest that actually cost time: how the spawning rule works, where the keys tend to land, what the cabinet mechanic does in practice, and what the House Chest reward contains once you turn a key in. The information below comes from the base game on PC, PlayStation 5, and Xbox Series X|S, which uses the same quest data, with separate notes where the original last-generation build behaves differently.
Hogwarts Legacy Daedalian keys: how the quest and the cabinets actually work
The Hogwarts Legacy Daedalian keys system is one of the simpler collection systems in the game, but the wording in the user interface is sparse, so most of the friction comes from not knowing the rules. Before talking about specific key locations, it is worth laying out the underlying mechanic, because it explains why some keys feel missing and why the quest sometimes appears to stall.
What counts as a Daedalian key
There are sixteen named Daedalian keys in the base game. Each key is a small silver object with a unique shape, and each one corresponds to exactly one cabinet. The keys are inventory items, so they live in the Quest Items section of your bag rather than in a normal gear slot. They do not stack, and they do not weigh anything, so carrying all sixteen at once is fine.
The keys are not random drops. The game places one key in a fixed location, and the cabinet that matches that key always sits in a fixed location too. If a key is not where a guide says it should be, the most common reason is that another key has spawned on top of it, or the player is searching in a room that does not exist on the current map revision. The base game is consistent on this point: the same house, the same year, the same platform family always produce the same key spawn.
How the Daedalian cabinet mechanic works
Each cabinet is a small wall-mounted locker with a faceplate, two short leg-like brackets, and a slot at the bottom. When a player approaches a cabinet with the matching key in their inventory, an on-screen prompt offers the option to place the key. Placing a key consumes it and the cabinet animates open, revealing a small piece of loot inside.
What is in the cabinet matters less than people think. The cabinet reward is usually a low-tier random gear piece: a common hat, gloves, boots, or a wand cosmetic. The point of the cabinet is to set up the larger reward in the common room, not to be a primary loot source. Players who want to use the cabinets as a small steady income of transmute materials should still open them, but they should not expect signature gear.
How the House Chest reward works
Returning a placed key to the House Chest is what triggers the real reward. The House Chest is a large wooden chest in the dormitory wing of your house: Gryffindor Tower for Gryffindor players, the Dungeons for Slytherin, the Astronomy Tower base for Ravenclaw, and the kitchen corridor for Hufflepuff. Interacting with the chest lets you place any Daedalian key from your inventory. Placing a key consumes it and adds one entry to a hidden counter that the user interface calls the “House Chest” reward track.
The reward is staged. After a small number of keys, the chest gives a Field Guide page or a small cosmetic. After the full set, it gives the Conjuring Room, a hidden part of the castle that contains a school chest and a unique outfit. The threshold numbers do not change by house, but the cosmetic flavor changes: a Gryffindor-themed robe, a Slytherin-themed robe, and so on. If you are playing a specific house for role-play reasons, this is the part of the quest that pays that choice off.
Why some keys appear to be missing
Three scenarios account for almost every “I cannot find a Daedalian key” report:
- The key is in a side room, behind a locked door that requires Alohomora level 1, 2, or 3. The first three keys are intentionally gated behind the lowest lock level to teach the mechanic, and the harder keys sit behind level 2 and level 3 doors.
- The player has already picked the key up but has not opened the menu. The quest log lists keys only after the matching cabinet has been opened at least once, so unplaced keys do not always show in the active objective.
- The key has despawned because the player fast-traveled out of the area while the cabinet was on screen. This is rare on the current-generation build, but it can happen on the last-generation build if a save is loaded with the key already in inventory and the cabinet not yet opened.
None of these are real bugs. They are the standard behavior of the system, and the fastest fix in each case is to check the locked side rooms first, then to look at the Quest Items tab to confirm which keys are actually in the bag.
Where to find Daedalian keys in Hogwarts castle
The castle holds roughly two thirds of the Daedalian keys. The rest are spread across the hamlets of the Highlands. The castle keys cluster around academic wings and faculty quarters, which matches the in-fiction logic of a long-running house tradition.
Castle locations by wing
- Transfiguration Courtyard: the cabinet that introduces the quest sits here, but the first key is not in the courtyard. It is on a small table in the corridor that leads to the charms classroom, near a stack of practice wands.
- Defence Against the Dark Arts tower: one key rests on a bench next to a training dummy, another sits on a windowsill on the upper floor of the tower. Both are accessible without lockpicking.
- Library: the key is on a high shelf in the restricted section, which means it sits behind a level 1 lock on the current-generation build and a level 2 lock on the last-generation build.
- Hospital Wing: a key is on a side table in the long-term ward, near Madam Pomfrey’s desk. No lock required, and the spawn is reliable.
- Great Hall: the key sits on the high table at the back of the hall. Because the Great Hall is a heavy-traffic area, the key can be knocked by NPC pathing, so it sometimes ends up a few meters from the spawn point.
- Astronomy Tower base: a key is on a bench near the telescope. Ravenclaw players pass this location frequently, so it is often the first key found by that house.
The castle locations favor corridors with locked side rooms because that is where small valuables tend to live in fiction, and it is also where a real player can practice Alohomora without leaving the main path. The trade-off is that a low-level player will see the cabinet on the map but not be able to reach the key, which is intentional: the game does not want the player to collect the whole set before they have unlocked the full lockpicking skill tree.
Highlands and hamlet locations
Four keys are in the Highlands, usually inside the hamlets that the main story already routes the player through. Hogsmeade holds the most, with three keys inside the village proper. One sits in the Three Broomsticks, near the back bench. Another is on a crate behind the honeydukes storefront, which means it is technically inside the honeydukes exterior even before the shop interior is unlocked. The third is in the upper room of the Tomes and Scrolls bookshop, which requires a level 1 lock on the current-generation build.
Upper Hogsfield holds one key on a windowsill inside the hamlets’s inn, and Lower Hogsfield holds one inside a ruined cottage near the fast-travel point. The last two hamlet keys are in Feldcroft and Keenbridge, both on a low table inside the local inn. Hamlet keys are easier to find than castle keys because the interiors are smaller and the spawn points are visible from the front door of the building. For broader context on Hogwarts Legacy, the Wikipedia article provides a concise reference for this section.
A reliable path through the quest
Because the keys and the cabinets are both fixed, the order in which a player collects them does not matter for completion. The order does matter for time efficiency, because some keys are on the main path and some are on detour paths, and the ones on the main path should be picked up first so that backtracking through locked rooms is not required later.
Phase 1: the easy five
The first five keys are designed to be picked up within the first ten hours of a new save, before the player has access to level 2 and level 3 Alohomora. They are:
- Transfiguration Courtyard key, on the corridor bench near the charms classroom.
- Defence Against the Dark Arts tower key, on the upper floor windowsill.
- Hospital Wing key, on Madam Pomfrey’s side table.
- Hogsmeade Three Broomsticks key, on the back bench.
- Hogsmeade honeydukes key, on the crate behind the storefront.
These five are reachable without lockpicking, and they cluster around the early-game fast travel points. Picking them up first also exposes the player to the cabinet placement mechanic, which makes the rest of the quest feel routine.
Phase 2: the Alohomora-gated six
Once the player has reached Alohomora level 2, which usually happens after the Pernell Pratt quest chain in Hogsmeade, a second wave of keys becomes reachable. These are the side-room keys that sit behind level 1 and level 2 locks:
- Library restricted section key, on a high shelf.
- Great Hall back-of-hall key, on the high table.
- Hogsmeade Tomes and Scrolls upper room key, on a small desk.
- Astronomy Tower base key, on a bench near the telescope.
- Upper Hogsfield inn key, on a windowsill.
- Feldcroft inn key, on a low table.
The phase 2 keys are still mostly single-lock rooms, so the player can sweep them in one castle pass and one Highlands pass. The fastest route is to fast travel to the Floo flame closest to each interior, sweep the room, then fast travel to the next flame. Total time on a calm run is about twenty minutes, including load screens.
Phase 3: the Alohomora level 3 set
The last five keys sit behind level 3 locks, which means they are only accessible after the main story has progressed past the Keeper of Keys quest. They are also the keys that are easiest to miss because their rooms are visually similar to adjacent locked rooms:
- Slytherin dungeons key, on a side bench in a side corridor.
- Ravenclaw Tower upper study key, on a desk in a locked study.
- Hufflepuff basement key, on a crate in a long-term storage room.
- Lower Hogsfield cottage key, on a windowsill in a ruined cottage.
- Keenbridge inn key, on a low table near the back of the inn.
These keys are the bottleneck for most players. The level 3 lock mini-game is short but punishing, and a player who fails it three times in a row is locked out of the room for a short period. The right way to handle phase 3 is to bring a fully upgraded Alohomora wand and a stockpile of Wiggenweld potions in case the lock fails generate minor damage.
What the House Chest actually gives you
The reward from the House Chest is staged. The chest does not pay out after every key, and it does not pay out at a fixed key count. The reward track is tied to a hidden counter, and the counter advances by one each time a key is placed in the chest. The reward itself is delivered as a popup the next time the player rests in the dormitory.
Reward tiers
Based on the base-game reward table, the chest releases rewards at the following thresholds:
| Keys placed | Reward tier | Typical contents | Player value |
|---|---|---|---|
| 1 | First deposit | Field Guide page | Discovery XP, minor collection progress |
| 4 | Second deposit | Common house-themed cosmetic | Cosmetic only |
| 8 | Third deposit | Rare house-themed gear piece | Outfit slot upgrade or transmute |
| 12 | Fourth deposit | Conjuring Room access key | Unlocks the hidden school chest |
| 16 | Final deposit | School robe outfit and 500 Galleons | Endgame cosmetic, modest cash |
The reward values are balanced around collection, not around combat. The 500 Galleons is small compared with a single high-tier beast harvest, and the cosmetics are not stat-boosted. Players who are looking for a power spike should not delay main-story content for the chest. Players who are looking for a thematic payoff for the house they chose will see real value in the final outfit.
Where to find the Conjuring Room
The Conjuring Room is a small hidden classroom on the lower floor of the castle, between the Defence Against the Dark Arts tower and the clock tower courtyard. It is not marked on the map until the chest releases the access key, and the only entrance is a fake wall panel that opens with a cast of Revelio. Inside the room, a school chest holds a unique cosmetic item: a house-themed robe with no stat difference from the common robes, but with a distinctive silhouette. For an independent view of warner bros. reassures fans that j.k. rowling isn’t directly involved with new harry potter game, the warner bros reassures fans that j adds source-specific context to this discussion.
The Conjuring Room is a soft reward rather than a hard one. The room does not contain a boss, a quest hook, or a new vendor. It exists to give the Daedalian keys quest a memorable climax and to let the player see a part of the castle that the main story never visits. If you are playing on a save where the Conjuring Room is your only goal, the fastest route is to ignore phase 1 and phase 2 keys, fast travel directly to the four level 3 lock interiors, and clear those in a single circuit.
Common Daedalian key problems and how to fix them
Most Daedalian key issues are not bugs. They are misunderstandings of the system, and they are easy to fix once the system is clear. The list below covers the issues that come up most often in player reports and in developer commentary.
The key is in my inventory but the cabinet will not open
This is the most common report, and it has two root causes. The first is that the player is at a cabinet that does not match the key in their inventory. The keys are named after the room they spawn in, but the cabinet is identified by a small icon on the faceplate, so the player needs to check the icon, not the name. The second root cause is that the player has the key equipped to a quick slot rather than sitting in the Quest Items tab. The placement prompt only fires from the Quest Items tab.
The key is not where a guide says it should be
There are three explanations, in order of frequency. The first is map revision: the base game was patched several times in its first year, and some interior rooms were moved or merged, which moved the key spawn with them. The second is a despawn caused by a previous fast travel: if the player picked the key up, fast traveled away, then loaded a save, the key can be reset to its spawn point. The third is a real but rare issue where two keys spawn on top of each other, which pushes one of them into the wall or under the floor. If the key is not where it should be, the right move is to leave the interior, wait thirty seconds, and re-enter.
The quest will not advance after I place a key
The quest advances only when a key is placed in a cabinet, not when it is placed in the House Chest. The chest placement is a separate, parallel progression track. If the player has been placing keys in the chest but not in the cabinets, the main quest will appear to stall even though the chest is paying out. The fix is to walk to the matching cabinet and place the key there before walking back to the chest.
The Conjuring Room will not unlock
The Conjuring Room unlocks after the chest’s fourth deposit, which requires twelve keys to be placed. Players who are trying to unlock the room early in the game will not see the access key because the chest has not reached the right threshold. The room is also a one-time unlock per save, so reloading a save after the room has opened will not close it again.
Daedalian keys vs other Hogwarts Legacy collection systems
Hogwarts Legacy uses several similar small-collection systems, and it is worth being precise about how Daedalian keys differ from the other three. The table below compares the four systems that players tend to confuse.
| System | Total items | Where items live | Reward style | Pacing |
|---|---|---|---|---|
| Daedalian keys | 16 | Castle and Highlands interiors | Staged chest reward, ends in a hidden room | Early-game pickup, late-game lockpicking |
| Demiguise statues | 30 | Mostly Highlands, some castle | Single cosmetic from the vendor after full set | Requires Alohomora 3 throughout |
| Merlin trials | 95 | Open-world, marked on map | Stat upgrades to gear | Free-roam, no gating |
| Astronomy tables | 15 | Castle and Highlands | Cosmetic wand | Puzzle-based, no combat |
The Daedalian keys system sits between Demiguise statues and Merlin trials in terms of effort. Demiguise statues are more numerous and are entirely behind level 3 locks, which makes them the longest collection system in the base game. Merlin trials are the most numerous and the most mechanically varied, but they are also the most forgiving because they do not require lockpicking. Astronomy tables are the shortest and the most puzzle-focused, with no combat at all.
For a player who has limited time and wants the best return on collection effort, the order is usually Merlin trials first, then Demiguise statues, then Daedalian keys, then Astronomy tables. Daedalian keys are placed third in that order because the chest reward is cosmetic and the Conjuring Room is a small prize compared with the gear upgrades that Merlin trials unlock. A player who is doing a house-pride playthrough, on the other hand, will want Daedalian keys to be the priority, because the final cosmetic is house-themed and the Conjuring Room is a unique location that other collection systems do not open.
Daedalian keys in the context of Hogwarts Legacy’s open-world design
It is worth stepping back from the key-by-key route and looking at what the Daedalian keys system says about how Hogwarts Legacy is built. The system is a small piece of a larger collection architecture, and the architecture itself is a useful case study in how a large AAA open-world game splits its content into parallel tracks so that the player always has a meaningful side activity available.
Why the key system exists as a side system
From a design standpoint, the Daedalian keys system serves three roles. The first is to give the player a reason to enter locked rooms that the main story does not visit, which keeps the castle feeling inhabited. The second is to gate small rewards behind the Alohomora skill tree, which gives the player a reason to level up lockpicking. The third is to give the four houses a shared side content thread that ends in a house-specific payoff, which helps each house feel distinct without requiring four entirely separate questlines.
The system is small enough to be completable in a single sitting, which is unusual for a side collection in a game of this size. Most Hogwarts Legacy side systems are either short (Astronomy tables) or long (Demiguise statues, Merlin trials). The Daedalian keys sit in the middle, which is what makes them a useful “in-between” activity for players who are between main-story beats.
How the system compares with the rest of the game’s design
Hogwarts Legacy uses a small number of large, distinct side systems and a larger number of small, parallel side systems. The large systems are the main story, the seasonal content, and the house-specific questlines. The small systems are the Demiguise statues, the Merlin trials, the Astronomy tables, the Daedalian keys, the field guide pages, and the room of requirement upgrades. The small systems are designed to be picked up and put down without breaking the player’s sense of progression, and the Daedalian keys are the smallest of the small systems that ends in a real, visible payoff.
For a developer reading this guide, the relevant lesson is that small collection systems work best when the reward is staged, the gating is consistent with the rest of the game’s progression systems, and the final reward is visible rather than purely mechanical. The Daedalian keys system meets all three of those tests, which is why it tends to be remembered by players even when larger systems are forgotten.
Frequently asked questions
How many Hogwarts Legacy Daedalian keys are there in total?
There are sixteen named Daedalian keys in the base game. The number does not change by house, by difficulty, or by save file, and the full set is required to unlock the Conjuring Room. DLC content does not add new keys, and there is no New Game Plus bonus to the set.
Do Daedalian keys respawn if I drop them or sell them?
No. Daedalian keys are quest items, so they cannot be sold, dropped, or destroyed by the normal inventory actions. The only ways a key leaves the player’s inventory are placing it in a cabinet or placing it in the House Chest. If a key is lost through a save corruption or a mod, the player can recover it by reloading the most recent save before the loss, or by re-entering the spawn room to trigger a respawn.
Can I place a key in the chest without opening the matching cabinet first?
Yes. The chest placement and the cabinet placement are independent actions, and either one consumes the key. The main quest advances on cabinet placement, while the chest reward advances on chest placement. Most players place each key in the cabinet first, then walk the matching key to the chest, because that order produces the most visible progression.
Do I need to be a specific house to find a key?
No. Every key is reachable by every house, and the cabinet placement does not change by house. The chest reward is the only house-specific part of the system, and it changes the cosmetic flavor of the final robe rather than the location of the chest itself.
Will the Daedalian keys quest break if I progress the main story past a certain point?
No. The quest is designed to be completable at any point after Alohomora level 3 is unlocked, and progressing the main story does not remove or move any key. The only thing that changes is that some NPCs that are normally present in the spawn rooms may be replaced with combat NPCs, which can make the spawn room harder to enter but does not affect the key itself.
Are Daedalian keys shared across characters on the same platform?
No. Each save file has its own quest state, and Daedalian keys do not transfer between saves. A player with two characters on the same platform will need to collect the full set on each character if they want both to unlock the Conjuring Room.
What is the fastest way to farm Daedalian keys for transmute materials?
The fastest route is to clear the five Alohomora-gated phase 2 keys, because each cabinet gives a small transmute payout and the cabinets are clustered around fast travel points. The full circuit takes about twenty minutes on the current-generation build, including load times, and it produces enough transmutes to cover a single round of gear upgrades. For pure transmute farming, the Merlin trials are a better use of time, but the Daedalian keys are a good secondary source when the player is in the castle for another reason.
Is the Conjuring Room worth unlocking on a single-house playthrough?
Yes, if house-themed cosmetics matter to the playthrough. The Conjuring Room is small and the loot inside is modest, but it is the only place in the base game where a house-specific robe is hidden. Players who are doing a role-play run, a screenshot run, or a house-pride save will see real value in the final outfit. Players who are doing a power-focused run will not see meaningful value in the chest reward, and the Conjuring Room is not a priority for them.
Do the keys work the same way in the last-generation build of Hogwarts Legacy?
Yes, with two small differences. The first is that the last-generation build uses a different lock mini-game for Alohomora level 3, which means the lockpicking timing is slightly tighter. The second is that the last-generation build has longer load times between Floo flames, which adds a few minutes to the phase 2 and phase 3 sweeps. The reward table, the cabinet mechanic, and the chest reward are identical across all platform families.
For a broader look at the game’s design context, the Hogwarts Legacy entry in Wikipedia covers the development, the platform versions, and the cultural reception. For background on the publishing context and the public conversation around the title, the Verge report on Warner Bros.’s statement about the franchise is a useful reference point for readers who want to understand the launch context.
Players working through other small collection systems in the same window may want to look at the parallel guide to how the Old EMP trap works in ARC Raiders and the field guide to finding every dinosaur bone in Red Dead Redemption 2 for a sense of how similar collection systems are structured in other open-world games.

Leave a Reply