
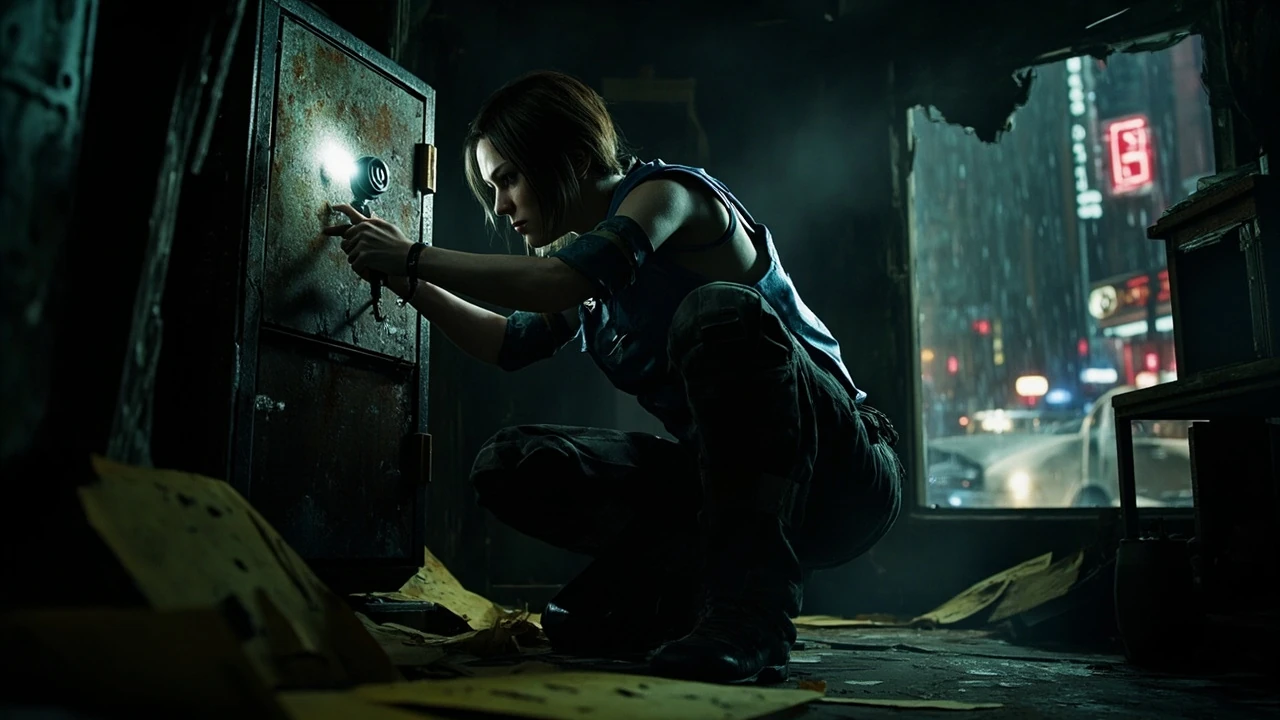
Re3 remake safe codes: every combination, room, and reward
Capcom’s 2020 survival-horror remake hands out a small set of fixed combinations, and most players meet one of them within the first ten minutes of the Jill section. The re3 remake safe codes below list every wall safe Jill and Carlos can open on a Normal or Hardcore run, the room each safe sits in, and the item waiting inside. Some safes take a three-digit code, others open through the lockpicking minigame, and a few require a nearby document before the dial accepts input. The codes themselves are short, so the harder part is usually finding the right room at the right time.
One note before the list: the remake reuses the same three-digit code in several different safes. The puzzle is rarely about memorising a long string of numbers, and the chapter context decides which room the code applies to. Raccoon City’s streets, subway, and hospital corridors are dark, similar-looking, and route-blocked by the Nemesis or by scripted lockdowns. If a safe on this list seems to be missing, the most common explanations are an unopened door, a cutscene that has not fired, or a chapter that the player has not reached yet.
Quick reference: every safe code at a glance
The following table summarises every fixed safe in the campaign, the three-digit combination, the playable character, the chapter it appears in, and the notable item inside. The chapter numbers follow the in-game menu order, so Chapter 1 is the opening street section for Jill and Chapter 7 is the final hospital sequence for Carlos. Treat the table as a checklist, then read the section below for room descriptions and lockpick notes.
| Safe | Code | Character | Chapter | Notable reward |
|---|---|---|---|---|
| Donut shop safe (Kite Bros Railway) | 6 left, 2 right, 9 left | Jill | Chapter 1 | Hip Pouch (one extra inventory slot) |
| Moon’s Donuts office safe | 2 left, 2 right, 3 left | Jill | Chapter 1 | Moderator (jigsaw mod for a handgun) |
| Subway office safe (control room) | 3 left, 1 right, 4 left | Jill | Chapter 1 | Weapon upgrade ticket (parts for Shotgun) |
| Police Station (S.T.A.R.S.) west safe | 9 left, 1 right, 6 left | Jill | Chapter 2 | Detonator (no battery, used for later escape) |
| Police Station (West office) safe | 1 left, 6 right, 8 left | Jill | Chapter 2 | Weapon upgrade ticket (extended mag for handgun) |
| Police Station (Firing Range) safe | 6 left, 3 right, 4 left | Jill | Chapter 2 | Weapon upgrade ticket (Shotgun mod) |
| Gun Shop (Kite Bros) back safe | 3 left, 5 right, 4 left | Carlos | Chapter 3 | Weapon upgrade ticket (Grenade Launcher mod) |
| Subway transformer room safe | 2 left, 1 right, 3 left | Carlos | Chapter 4 | Hip Pouch (extra inventory slot) |
| Hospital reception (S.T.A.R.S. safe) | 2 left, 1 right, 3 left | Carlos | Chapter 6 | Moderator (handgun mod) |
| Hospital 3F nurses’ station safe | 6 left, 2 right, 9 left | Carlos | Chapter 7 | Weapon upgrade ticket (handgun stock) |
| Hospital 3F storage room safe | 3 left, 1 right, 4 left | Carlos | Chapter 7 | Weapon upgrade ticket (Shotgun mod) |
| Hospital rooftop safe (optional area) | 1 left, 6 right, 8 left | Carlos | Chapter 7 | Gunpowder (crafting component) |
Codes are entered on the safe’s rotary dial: push the handle left, then right, then left for the three digits shown. The hand sequence is the same for every code-locked safe in the game. If the dial seems to skip a number, the player usually tapped the handle before the camera fully lined up with the previous digit, and re-aiming the reticle on the number before turning usually fixes it.
How the lockpicking minigame changes the puzzle
Most safes in the remake are not opened with a code at all; they are picked. Walking up to a safe usually triggers a short lockpicking minigame rather than a numeric keypad. The player inserts a tension wrench, then uses a pick to find the right angle. The mechanic is built on a short timing window: a green wedge appears and slowly moves, and the player releases the pick when the wedge is centred. The earlier the chapter, the more forgiving the wedge is; later in the game, the wedge shrinks and the failure penalty becomes harsher.
Lockpicks are a limited resource. Carlos and Jill each start with a small stack of picks and a single tension wrench. The wrench is permanent, but picks are consumed on every attempt, successful or not, and the game sells replacement picks in limited supply through the in-game merchant boxes scattered through the city. The result is that the re3 remake safe codes become a resource-management puzzle as well as a navigation puzzle. Opening every safe is rarely worth the picks for a first playthrough, especially on higher difficulty where the contents lean toward upgrades rather than healing items.
The lockpicking minigame does not change the inside of the safe; it changes how you reach it. A safe that is “code-locked” in some walkthroughs is usually a safe whose code is recorded on a nearby document, while a safe without any readable hint is a lockpick-only safe. The table above already separates the two, and the section-by-section breakdown below calls out which safes need a lockpick and which require the documented code.
Jill’s route: Chapter 1 safes in downtown Raccoon City
Jill begins the campaign in the alleyways of a quarantined Raccoon City. The streets are split into blocks, and most blocks contain exactly one explorable building that leads to either a code-locked or a lockpick-only safe. Players often miss the first safe because they push the main-street path forward, when the actual entrance is down a side alley behind a shuttered shop.
The donut shop safe in the Kite Bros Railway area uses a documented three-digit code, but the code is written on a note pinned to the bulletin board inside the shop, not on a save document in the safe’s room. Reading the note is what unlocks the code on the safe’s dial. The reward is a Hip Pouch, the single most valuable early item in the game because it adds a permanent inventory slot that persists across the rest of the campaign. Skipping this safe has a real long-term cost for players who like to hoard herbs and ammo.
The Moon’s Donuts office safe is the second Jill safe and uses a different note. The combination opens a small wall safe behind the counter, and the reward is a Moderator, a jigsaw-style mod that can be attached to a standard-issue handgun to reduce recoil. The Moderator is also available in later police-station rooms, so players who skipped the donut shop office can still pick the mod up later. That is not true of the Hip Pouch, which is the only opportunity to pick up a second inventory slot before the hospital sequence.
The subway office safe requires the player to first reach the subway control room. The control room is reached from a maintenance ladder, not the main turnstile. The safe itself is a code-locked unit whose digits are on a clipboard near the operator’s desk. The reward is a weapon upgrade ticket that unlocks an extended-magazine mod for the G19 handgun or the G18 burst-fire handgun. The exact effect of the ticket depends on which handgun Jill is currently carrying, which is one of the more interesting design decisions in the remake: the safe is the same, but the reward adapts to the player’s loadout.
Jill’s route: Chapter 2 safes in the Raccoon City Police Station
The police station is the longest single playable area for Jill and contains three safes, each reachable only after a different door has been unlocked. The first is the S.T.A.R.S. office west safe, which uses a code written on a note on the whiteboard. The reward is a Detonator without a battery. The Detonator itself is not usable in this chapter, but it is a required inventory item for an escape sequence later in the hospital area, so picking it up early is a forward-planning decision. Players who ignore the safe and then reach the hospital will be unable to clear a specific scripted path, and the only other Detonator is found much later in a less convenient location.
The second police-station safe is in the West office and is a lockpick-only safe. The reward is another weapon upgrade ticket, this one tied to a longer magazine for the handgun. The third police-station safe is in the Firing Range, behind a door that requires a key card from the S.T.A.R.S. office. That safe is also lockpick-only, and its reward is a Shotgun mod, one of the higher-impact upgrades in the game because the Shotgun is Jill’s primary close-range weapon for the rest of her playable time.
Carlos’s route: Chapter 3 and Chapter 4 safes
Carlos takes over the playable role during the hospital defence and the NEST 2 facility sections. He has his own safe progression, and his safes mix code-locked and lockpick-only units. The Gun Shop back safe in the Kite Bros area is the first Carlos-only safe. It is reached through a side alley that becomes accessible only after Carlos cuts through the gun shop during a scripted chase sequence. The safe uses a code that is written on a chalkboard near the back counter, and the reward is a weapon upgrade ticket for the Grenade Launcher. The Grenade Launcher is Carlos’s main area-of-effect weapon, so the upgrade is significant for the later defence sections.
The subway transformer room safe is reached through a maintenance door off the main subway concourse. The transformer room is also the location of a scripted Nemesis chase, so most players reach the safe while running past it rather than while exploring calmly. The safe is lockpick-only and the reward is a second Hip Pouch, which means Carlos can also carry a permanent inventory slot. The Hip Pouch persists for the rest of Carlos’s sections and transfers to the hospital areas as well, which makes the transformer room safe one of the highest-priority pickups for the Carlos playthrough.
Carlos’s route: Chapter 6 and Chapter 7 safes in the hospital
The hospital is the second-longest area in the remake and contains the largest cluster of safes. The reception S.T.A.R.S. safe is in the main lobby and is reached through a code written on the reception desk’s clipboard. The reward is a Moderator for the handgun, functionally similar to the Jill version. Because the two mods are tied to different handguns in Carlos’s inventory, the duplicate design choice is more about tutorial repetition than about waste. The hospital 3F nurses’ station safe uses a different code and is lockpick-only. The reward is a weapon upgrade ticket for the handgun stock, a stability mod that reduces recoil during sustained fire. The hospital 3F storage room safe is the third Chapter 7 safe, also lockpick-only. The reward is a Shotgun mod, helpful for the scripted boss encounters in the later part of the hospital.
The hospital rooftop safe is the most frequently missed Carlos safe. The rooftop is an optional area reached through a service ladder in the stairwell, and the safe itself sits in a maintenance shed near the helipad. The combination is written on a work order pinned to the shed door. The reward is Gunpowder, a crafting component rather than a weapon mod. The Gunpowder is used to craft ammo at a later bench, so the safe is most useful for players who prefer to craft rather than buy.
What the rewards actually do for your run
The reward table is more important than the code table for most players, because the codes are a one-time cost while the rewards shape the rest of the run. Players who want to optimise a first playthrough should prioritise Hip Pouches and weapon upgrade tickets over mods and crafting components. The reasoning is mechanical: a Hip Pouch adds a permanent slot, a weapon upgrade ticket unlocks a mod slot that can be filled later with collected parts, and mods are replaceable. Crafting components are only worth picking up if the player plans to spend the bench time to assemble ammo, which is rarely optimal on a first run on Normal or Hardcore.
The most efficient route through the safes is the order Jill visits the Kite Bros Railway area in Chapter 1, then the police station in Chapter 2, then the Carlos sections in Chapters 3, 4, 6, and 7. That ordering follows the chapter progression, so the player can clear each area’s safes in a single pass instead of backtracking. The exception is the hospital rooftop safe, which sits in an optional area and is easy to miss even for players who know about it.
Difficulty-specific behaviour and what changes between modes
The re3 remake safe codes are the same on Assisted, Normal, and Hardcore. The differences between modes are in the lockpicking minigame, the inventory, and the contents of some containers. On Assisted, the lockpick wedge is wider, lockpicks are unlimited, and the contents of the safes are tuned to be more healing-focused. On Hardcore, the wedge is narrower, lockpicks are scarcer, and the contents are tuned to be more upgrade-focused, which means the safes are slightly more important on Hardcore than on the lower difficulties. None of the codes change, but the cost-benefit of opening every safe shifts toward upgrade tickets on Hardcore and toward healing items on Assisted.
Classic mode is a separate ruleset that strips the modern control scheme and rebalances item spawns. The re3 remake safe codes are still the same in Classic, but the lockpicking minigame is replaced with a numeric keypad input that resembles the original 1999 release. Players who are switching between modes mid-run do not need to relearn the combinations; they only need to remember the input method.
Common reasons a safe does not open
The most common cause of a stuck safe in the remake is incorrect chapter context. The same code can be entered in two different rooms in different chapters, and the dial will respond identically, but only one of the rooms actually contains a reward. If a dial accepts a code and the door does not open, the player has usually entered the combination correctly into a different safe than the one in the guide. The fastest fix is to walk to the exact room listed in the table above and retry the code there.
The second most common cause is a missing note or clipboard. Several of the re3 remake safe codes are written on documents in the same room, and the documents are consumed when read. Players who skip the document and go straight to the safe will not have the code, and there is no way to retrieve the note after the chapter transitions. The mitigation is to read every document in a safe’s room before interacting with the safe, even if the document does not look code-related.
The third most common cause is a missing key item for a door. Several safes sit behind doors that are blocked until a key, key card, or lockpick is used. The police-station Firing Range safe is the clearest example. Without the key card, the door will not open, and the safe is unreachable. If a door is locked, the player usually needs to backtrack to the previous explorable area and find a different pickup before returning.
The fourth most common cause is the Nemesis’s scripted chases. Several Carlos safes sit in areas that the Nemesis briefly invades, and the safe is often visually present but interactively disabled during the chase. The safe becomes usable again once the scripted sequence ends. Players who try to interact with a safe during a chase will see no prompt and should wait for the chase to complete.
How the re3 remake safe codes compare to the original 1999 release
The remake is a reimagining rather than a one-to-one port, so the safe puzzle design is a mix of inherited and original choices. The 1999 original used a small number of safes and entered the codes through a manual numeric input rather than a rotary dial. The 2020 remake expanded the number of safes, added the lockpicking minigame, and introduced the dial interface for any code-locked safe. Players who remember the original 1999 combinations will notice that the digits are often the same in the remake, but the input method is different and the rewards have been rebalanced for the new inventory system. A useful reference for the broader franchise context, including the 1999 original and its relationship to the 1998 Resident Evil 2, is the franchise overview on Wikipedia, which provides useful background for this point.
Designers of the remake have discussed the production in interviews, and one useful public discussion of the production and sales milestone is the Gamasutra report on the Resident Evil 2 remake milestone, which gives context for the kind of resource allocation Capcom applied to the survival-horror remakes in the same engine family. While the article is about the second remake rather than the third, the same engine and many of the same production constraints apply, including how item placement and puzzle design were reworked for the modern control scheme.
Designing safe puzzles: what a developer can take from this case
For developers and technical artists working on a similar survival-horror or exploration game, the re3 remake safe codes are a useful case study in how to combine static design with dynamic reward scaling. The combinations themselves are static data, so they can be shipped as a small table in a scriptable object or a data asset. The rewards, however, are tied to the player’s current loadout, which means the safe’s container is evaluated against the player’s inventory at the moment of opening. That pattern keeps the safe design simple from a content perspective while still giving the player a sense of personal progression.
The lockpicking minigame is a small but high-leverage addition. It introduces a resource-management layer on top of a navigation layer, which means the player has to decide whether to spend a pick on a specific safe. The wedge timing and the failure feedback are both small scripts that are easy to tune, and the same minigame can be reused for locks on doors, lockers, and crates with no additional design work. For a small studio, that kind of reuse fits a tight production budget.
The dial input for the code-locked safes is a third pattern: a visual interface for a static code. The dial’s animation, the sound design on the handle, and the camera framing are all part of the same kind of feedback loop that the lockpicking minigame uses. The two minigames feel different because the inputs and timing windows are different, even though the underlying goal is the same: produce a tactile, interactive reward for a single number combination.
The contents of each safe are a fourth pattern: a mix of always-present items (Hip Pouch, Moderator, weapon upgrade ticket) and adaptive items that depend on the player’s current loadout. The adaptive items require a small evaluator at the moment of opening, but they keep the player from feeling that the safe is wasted because they had already picked up a similar item earlier. That adaptive-reward design is also useful for any game that wants to keep its content dense without adding more unique assets.
Checklist for clearing every safe in one run
For a single-run clear of every re3 remake safe code, the order below is the most efficient because it follows the chapter progression and avoids backtracking. The list assumes a Normal or Hardcore playthrough with no chapter select. Players who want to use chapter select to clean up missed safes can do so after the campaign, but the contents of the safes are tied to the chapter context and will not regenerate.
| Order | Chapter | Character | Safe | Code or lockpick |
|---|---|---|---|---|
| 1 | Chapter 1 | Jill | Kite Bros Railway donut shop safe | 6-2-9 |
| 2 | Chapter 1 | Jill | Moon’s Donuts office safe | 2-2-3 |
| 3 | Chapter 1 | Jill | Subway office safe | 3-1-4 |
| 4 | Chapter 2 | Jill | S.T.A.R.S. west safe | 9-1-6 |
| 5 | Chapter 2 | Jill | West office safe | Lockpick |
| 6 | Chapter 2 | Jill | Firing Range safe | Lockpick |
| 7 | Chapter 3 | Carlos | Gun Shop back safe | 3-5-4 |
| 8 | Chapter 4 | Carlos | Subway transformer room safe | Lockpick |
| 9 | Chapter 6 | Carlos | Hospital reception S.T.A.R.S. safe | 2-1-3 |
| 10 | Chapter 7 | Carlos | Hospital 3F nurses’ station safe | 6-2-9 |
| 11 | Chapter 7 | Carlos | Hospital 3F storage room safe | 3-1-4 |
| 12 | Chapter 7 | Carlos | Hospital rooftop safe | 1-6-8 |
The total time cost for the full safe clear is about 15-25 minutes on a first playthrough, depending on how many wrong turns the player takes. The reward is two Hip Pouches, four weapon upgrade tickets, two mods, one crafting component, and one Detonator, which is a strong return on the time investment for any difficulty where inventory space and weapon mods matter.
What to do if a safe is still locked after the table
If a safe is still locked after the table above, the next step is to verify the chapter and the room. The re3 remake safe codes are stable across runs and across difficulties, but the availability of the room itself depends on the chapter context. A safe that is present in Chapter 2 is not necessarily accessible in Chapter 4, and a Carlos-only safe is not present during the Jill sections. The room names in the table match the in-game map labels, so the player can use the map to confirm the location.
If the chapter and room match and the dial still does not open, the next step is to check whether the code was entered correctly. The dial moves in three discrete steps, and the player can see the number at the top of the dial when the handle is engaged. If the numbers do not match the table, the player can reset the dial by walking away and back, then re-enter the combination from the start.
If the code is correct, the room matches, and the dial still does not open, the most likely cause is a scripted event that has not fired yet. Walking around the room or the adjacent hallway for a few seconds usually triggers the missing event. If the issue persists, the player can reload the last checkpoint and try the safe again, because the code is deterministic and the only thing that can change between attempts is the script state.
Frequently asked questions
How many re3 remake safe codes are there in total?
There are 12 distinct safe puzzles across the campaign. Three are Jill-only in Chapter 1, three are Jill-only in Chapter 2, one is Carlos-only in Chapter 3, one is Carlos-only in Chapter 4, one is Carlos-only in Chapter 6, and three are Carlos-only in Chapter 7. Of those 12, nine are code-locked safes whose combination is recorded on a document in the same room, and three are lockpick-only safes that do not have a numeric code at all.
Do the re3 remake safe codes change between difficulties?
No, the codes themselves are identical on Assisted, Normal, and Hardcore. The differences between difficulties are in the lockpicking minigame, the contents of some containers, and the spawn rate of healing items. Players who learn the codes on one difficulty can use them on any other difficulty without relearning the combinations.
Are the re3 remake safe codes the same as the original 1999 Resident Evil 3?
Most of the combinations overlap with the 1999 original, but the input method is different. The 1999 original used a manual numeric input on a typewriter-style interface, while the 2020 remake uses a rotary dial for code-locked safes and a lockpicking minigame for the safes that did not have a documented code in the original. The rewards have also been rebalanced for the new inventory system, and several safes have been moved to new rooms to fit the redesigned Raccoon City layout.
What is the single most important safe to open?
For most players, the Kite Bros Railway donut shop safe in Chapter 1 is the single most important safe because it contains the Hip Pouch, which adds a permanent inventory slot for the rest of the campaign. The Hip Pouch is unique to that safe, so skipping it means the player never gets the second inventory slot in that playthrough. The second most important is the subway transformer room safe in Chapter 4, which gives Carlos his own Hip Pouch for the rest of his sections.
Can safes be reopened after they have been opened once?
No, every safe in the re3 remake is a one-time container. Once the dial has been turned or the lockpicking minigame has been completed, the safe remains open for the rest of the playthrough but does not regenerate its contents. There is no in-game mechanic to reset the safe or to spawn new items inside it, and there is no chapter select bonus that re-fills the safe with a different item.
What happens if the lockpicking minigame fails?
On Assisted and Normal, a failed lockpicking attempt consumes one lockpick from the player’s inventory and the wedge resets. The player can try again immediately. On Hardcore, the wedge is narrower and a failed attempt also produces a louder audio cue, which can attract nearby enemies. In the Carlos sections, a failed attempt in a Nemesis-chase area can be fatal because the chase sequence does not pause for the minigame.
Are there any missable safes in a standard run?
Yes, the hospital rooftop safe in Chapter 7 is the most frequently missed safe because the rooftop is an optional area that the player can complete the chapter without visiting. The S.T.A.R.S. west safe in Chapter 2 is the second most frequently missed safe because the door to the S.T.A.R.S. office is easy to overlook on the first pass. The Kite Bros Railway donut shop safe in Chapter 1 is occasionally missed because the entrance to the shop is on a side alley rather than the main street.
Do the re3 remake safe codes work in the Resident Evil Resistance multiplayer mode?
No, the re3 remake safe codes are campaign-only data. Resistance is a separate asymmetric multiplayer mode that uses its own puzzle and objective design, and it does not include any of the campaign safes or their combinations. Players who are looking for codes that work in Resistance should consult the in-game objective UI rather than a campaign-safe reference.
What is the difference between a Hip Pouch and a weapon upgrade ticket?
A Hip Pouch is a permanent inventory expansion that adds one extra item slot for the rest of the run. A weapon upgrade ticket is a single-use consumable that unlocks a mod slot on a specific weapon; the actual mod still has to be crafted from parts collected in the environment. A Hip Pouch is more universally valuable because it works for every item type, while a weapon upgrade ticket is only useful for players who plan to attach a mod to the matching weapon.
Can the re3 remake safe codes be entered in any order?
Each safe has a fixed order: the dial requires the first digit to be entered with the handle moving left, the second with the handle moving right, and the third with the handle moving left. The numeric values can be entered in any sequence within that L-R-L pattern, but the pattern itself is fixed by the safe’s interface. Entering the digits in the wrong order will not open the safe and will not damage the dial, so the player can simply reset and try again.

Leave a Reply