
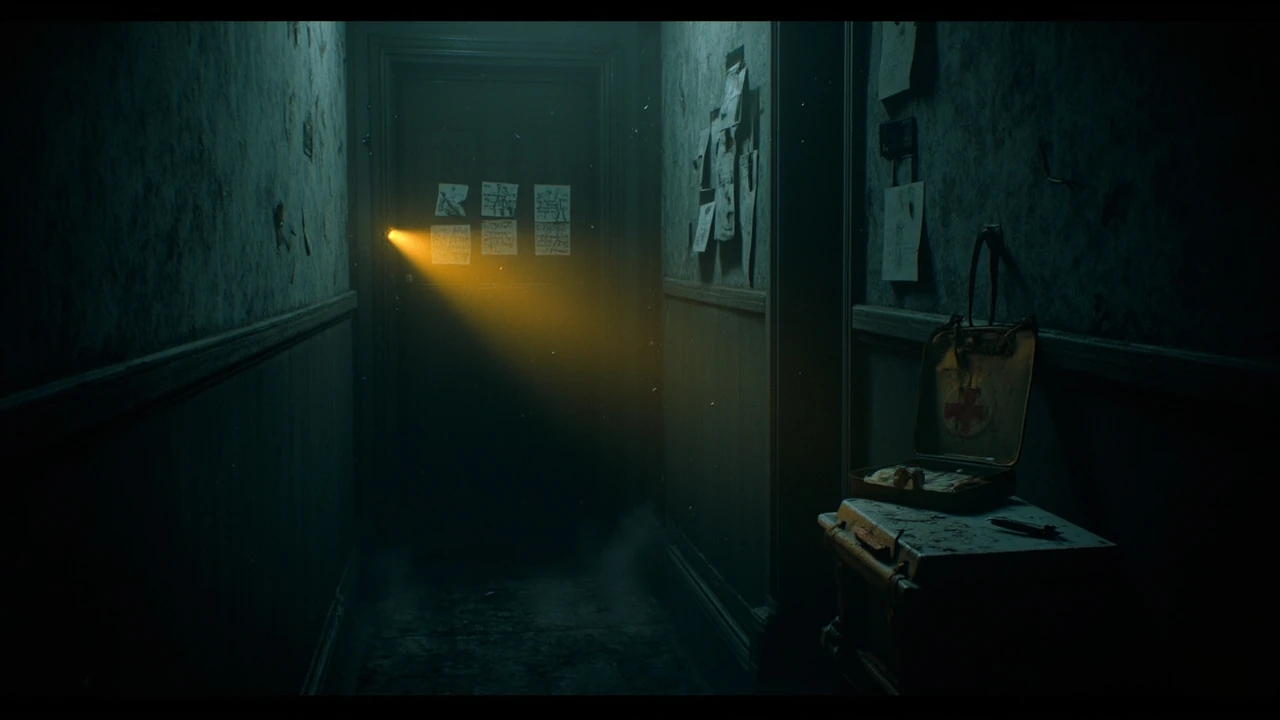
Resident Evil Requiem walkthrough
Survival horror runs on pressure, and pressure comes from decisions that have to be made before the game explains them. A clean first run through Resident Evil Requiem depends less on reflexes and more on how you spend the first few resources, which rooms you clear first, and which threats you choose to engage. This walkthrough follows the confirmed chapter flow, the practical checks that keep a save from collapsing, and the trade-offs that the inventory system forces on every player.
Rather than restating every pickup location, the guide focuses on the moments that decide whether the run stays under control: how to size up a new area, when to fight, when to detour, and how to read the signals the game gives when a path is meant to be revisited later. Use the chapter sections in order for a first playthrough, and treat the later sections as reference material when a return trip is required.
How to use this Resident Evil Requiem walkthrough
A walkthrough is only useful if it matches how you actually play. Three reading styles cover most cases, and each one leans on a different part of this guide.
- Sequential first run. Read the chapters in order and follow the suggested path. The notes call out the items that have to be carried forward and the rooms that are safer to skip on a first visit.
- Stuck check. Jump to the chapter matching the current objective marker, confirm the prerequisites, and read the puzzle or encounter section only.
- Resource audit. Use the tables and the resource section to compare what you have, what you can carry, and what the next safe room requires before opening a locked door.
Two reminders apply across every chapter. First, the game is built around the assumption that the player is short on healing, ammo, and inventory space, so a detour that costs a healing item needs a clear reason. Second, several side areas only make sense after a later tool is unlocked, so coming back to a room that looked empty is often the intended design rather than a bug.
Core systems that shape the walkthrough
Resident Evil Requiem reuses the survival template but reshapes it in ways that change the route through the chapters. Five systems are worth learning before the first encounter.
Inventory weight and carry capacity
Items have weight, not just slots, and the carry limit bites harder than the slot count. Healing items weigh more than ammo, and key items count toward the same pool. The inventory screen is also where the player decides which item becomes the active quick-use, and there is no way to swap on the fly without opening the menu. Leaving a high-value healing item in storage is a real choice, not a cosmetic one, and it shapes which fights can be attempted and which have to be avoided.
Healing, status, and damage types
Healing is split between immediate health recovery and longer status effects such as poison, bleeding, and infection. Each status effect has a matching cure item, and using the wrong one wastes a slot. Bleeding ticks down health steadily until a bandage is used; poison reduces max health for a short time; infection starts a timer that has to be cured before it expires. Knowing which condition is active matters because the wrong item still consumes a use.
Ammo economy and weapon roles
Each firearm fills a role, and the walkthrough treats the role rather than the weapon name as the unit of advice. Handguns are reliable against common enemies and weak against armored targets. Shotguns dominate close encounters but spend two rounds per trigger pull. Special weapons appear in single chapters and either carry a puzzle component or a crafting recipe, so they are worth holding until the relevant encounter.
Save rooms and the recovery economy
Save rooms are also storage rooms, and storage is shared across the run. Items placed in storage remain available but must be retrieved in person, which costs time and route length. The walkthrough uses save rooms as decision points rather than rest stops: a saved loadout that the next chapter can use without backtracking is worth more than a fully healed character with an empty inventory.
Chapter gates and key progression
Progression is gated by a small number of key items, several of which look like ordinary pickups until the matching door is found. The walkthrough calls out which items are linear (used once and discarded) and which are reusable (tools that stay in the inventory for later chapters). Confusing the two is the most common cause of a stuck state.
Chapter 1: First contact and the safe zone
Chapter 1 is short on purpose. The game uses it to teach movement, item pickup, and the first save room. The walkthrough treats it as a calibration chapter.
- Pick up the handgun and the small ammo crate in the opening corridor. The first enemy is designed to be dispatched with three shots, so do not spend melee resources.
- Clear the first side room for the map fragment, then back out without opening the locked drawer. The key for that drawer appears in chapter 3.
- Reach the save room and place either the spare ammo or the second healing item into storage. Carry only what the next corridor can use, and re-equip the heal as the active item.
- Proceed to the scripted encounter in the basement stairwell. The walkthrough recommends kiting the enemy into the doorway so the body is not blocking the upper stairs during the retreat.
- End the chapter at the chapter exit door. The cutscene that follows is not a save point, so any inventory edit has to be made in the save room before the trigger.
The mistake to avoid in chapter 1 is opening every container. Containers in this chapter respawn nothing and the time spent searching rooms that are not the safe zone is time the player cannot recover later.
Chapter 2: Resource pressure and the first puzzle gate
Chapter 2 introduces the puzzle gate, an area that cannot be left until a multi-step puzzle is solved. The walkthrough treats the gate as a resource sink and routes around the optional fights until the puzzle is complete.
Puzzle order
The puzzle is a three-symbol plate that matches a painting, a desk drawer, and a wall plaque. The order in which the symbols are read does not matter, but the order in which the rooms are entered does. Entering the painting room first gives the matching symbol with no enemy contact. Entering the plaque room first costs one healing item because a single enemy patrols the corridor.
Enemy behavior in the gate
Two enemy types share the gate. Standard enemies route on sound and give a generous audio cue before they commit to a chase. Armored enemies ignore the sound cue and pursue on sight. The walkthrough recommends avoiding the armored enemy on the first visit and returning once a shotgun is available.
Inventory state at the end of chapter 2
The chapter ends with one carry slot taken by the key item required for chapter 3. The walkthrough recommends depositing the spare ammo into storage at the chapter 2 save room and carrying forward a single healing item plus the handgun. The shotgun, if found, is held in storage until chapter 4.
Chapter 3: Tool unlock and the return path
Chapter 3 is the first chapter with a reusable tool. The crowbar opens locked drawers, the bolt cutters sever chains, and the hacking device interacts with electronic locks. The walkthrough treats the crowbar as the priority pickup because it unlocks the most containers.
Return path checklist
Three rooms in chapters 1 and 2 are now reachable with the new tool. The walkthrough recommends the following order for the return trip:
- Basement drawer (chapter 1) with the crowbar: contains a healing item and a recording.
- Plaza chain (chapter 2 courtyard) with the bolt cutters: contains ammo and a codex entry.
- Office door (chapter 2 side room) with the hacking device: contains a weapon upgrade part.
The order is chosen so that each tool is used as soon as it is found, which prevents the player from carrying three tools into an area that only needs one.
Mid-chapter boss encounter
The mid-chapter boss is a chaser with a damage threshold. The threshold means that damage below a certain amount per shot does not stagger the boss, and the handgun falls below the threshold once the boss enters its second phase. The For additional context, walkthrough recommends using the shotgun for the first phase to build stagger and switching to the handgun for the second phase, when the boss becomes more mobile but the threshold drops.
Chapter 4: Vertical map and the stamina economy
Chapter 4 introduces the stairwell network, the map layer where vertical routing starts to matter. Stamina governs climbing, kicking, and the recovery animation after a hit, and the chapter uses stamina as a resource in the same way the inventory uses weight.
Stamina management rules
- Kick attacks spend more stamina than they deal damage in this chapter, so they are reserved for the scripted encounter at the top of the east stairwell.
- Climbing a long ladder drains stamina and leaves the character vulnerable on the upper platform. The walkthrough recommends clearing the upper platform before climbing.
- Stamina recovery is faster when standing still than when walking, so a two-second pause after a chase is worth more than a sprint to the next corner.
Side areas and optional rewards
Two side areas in chapter 4 reward backtracking with codex entries and a permanent weapon upgrade. Neither reward is required to finish the chapter, but the weapon upgrade shortens the chapter 5 boss fight by one full phase. The walkthrough recommends taking the upgrade on a first run and skipping it only when the inventory is already at the weight limit.
Chapter 5: Save room stress test
Chapter 5 has the most save rooms and the most enemy density, which makes it the chapter where the resource economy is most punishing. The walkthrough treats the save rooms as decision points rather than rest stops.
| Save room | Suggested loadout leaving the room | Reason |
|---|---|---|
| Save 1 (chapter entry) | Handgun, single healing item, no special weapon | Light load for the first stealth section |
| Save 2 (mid chapter) | Handgun, shotgun, two healing items | Armored enemy patrol begins here |
| Save 3 (pre-boss) | Shotgun, special weapon, one healing item | Boss fight uses both weapons |
The pattern above is the one the walkthrough uses on a clean run. The chapter does not require the player to carry all three healing items through the entire map, and a heavier loadout at the chapter entry actually makes the stealth section harder to clear without taking damage.
Chapter 6: Branch path and the inventory swap
Chapter 6 is the first branch, with one path leading to the chapter 7 safe route and the other leading to the chapter 7 ambush route. The choice is made by the order in which two switches are flipped, and the choice is reversible until the second switch is triggered.
Safe route
The safe route skips the ambush section of chapter 7 and trades a weapon upgrade for an extra save room. The walkthrough recommends the safe route on a first run because the extra save room absorbs the cost of an early mistake in the chapter 7 boss fight.
Ambush route
The ambush route adds two scripted encounters and rewards the player with a permanent stat increase, but it removes one save room. The ambush route is the right choice on a second run, when the player knows where the chapter 7 boss spawns and can plan around the missing save room.
Chapter 7: Boss fight and the chapter gate
Chapter 7 is a single boss fight split across two phases, with a chapter gate that opens only after the boss is defeated. The fight is the test of every system the walkthrough has built up to this point.
Phase 1: Threshold and crowd control
Phase 1 is built around the damage threshold mechanic introduced in chapter 3. The walkthrough recommends the shotgun as the primary weapon and the handgun as the cleanup weapon. The phase ends when the boss enters the cutscene that triggers the floor collapse, and the player has to reach the lower level before the timer expires.
Phase 2: Movement and stamina
Phase 2 trades the damage threshold for a stamina drain, and the player has to manage stamina while keeping line of sight on the boss. The walkthrough recommends dodging toward cover rather than away from it, because the boss melee attack sends the player in the direction of the dodge.
Common failure modes
- Healing during the cutscene between phases. The animation is long enough that the healing item finishes, but the invulnerability window ends before the player can move. Wait for the floor collapse to finish before healing.
- Spending the special weapon in phase 1. The phase 2 stamina drain is the only moment the special weapon reaches its damage cap, so saving it for phase 2 is the difference between a one-cycle and a two-cycle kill.
- Forgetting the chapter gate. The boss does not open the gate automatically. The walkthrough recommends moving to the marked console after the kill animation finishes.
Chapter 8: Resource audit and the final route
Chapter 8 is the longest single chapter, and the walkthrough treats it as a resource audit. The chapter opens with a save room that the player has to leave with the correct loadout for the rest of the run.
Final route loadout
| Slot | Recommended item | Optional swap |
|---|---|---|
| Weapon 1 | Shotgun with maxed upgrade | Special weapon for the final boss |
| Weapon 2 | Handgun with extended magazine | Submachine gun if upgraded |
| Healing | Two full heals, one status cure | Three heals if inventory weight allows |
| Key item | Chapter 8 key (required) | None |
The optional swap column reflects choices that the player has earned by the time they reach chapter 8. A player who skipped the chapter 4 weapon upgrade will not have the upgraded shotgun, and the table reflects that by listing the special weapon as the alternative.
Resource management reference
The walkthrough uses a small set of rules to keep the inventory under control. The rules are listed in priority order, with the most important rule first.
- Healing items are spent before ammo. A dead player cannot reload, and an empty weapon is less costly than an empty health bar.
- Status cures are kept until they are needed. A poison cure used on a bleeding status wastes a slot and leaves the player exposed to the next status effect.
- Ammo is stored rather than carried. The carry weight of a full ammo box is usually higher than the value of the rounds inside, because the storage room is closer than the next encounter.
- Key items are checked against the chapter list before being stored. A stored key item that is needed in the next chapter costs a full round trip to the storage room.
- Weapon upgrades are prioritized over extra weapons. One upgraded weapon is more efficient than two unupgraded weapons, and the inventory slot freed by the consolidation is worth more than the second weapon.
The order of the rules is not interchangeable. A player who keeps all ammo on the character will run out of healing slots; a player who keeps all healing items will run out of ammo. The rules are designed to keep the player in the middle.
How to read the in-game signals
Resident Evil Requiem signals a stuck state in three ways, and each one has a matching fix that the walkthrough uses before opening a guide.
- Music shift without a visible enemy. The signal means an enemy is in an adjacent room. The fix is to wait in the doorway for the audio cue to fade before entering.
- Locked door that opens from the other side. The signal means the door is part of a return path. The fix is to note the door and continue along the main route until the matching key is found.
- Empty room with a single container. The signal means the container is a quest item. The fix is to inspect the container without opening it, because the inspection animation includes a hint about the next chapter.
The signals are reliable because the game uses the same audio cues and the same door logic across all chapters. A player who learns the signals in chapter 1 will recognize them in chapter 8 without having to re-learn the rules.
Common mistakes on a first run
Most failed runs come from a small number of recurring mistakes. The walkthrough lists the mistakes in the order in which they usually happen.
- Opening every container in chapter 1. The containers are designed to be revisited with the chapter 3 tools, and opening them early burns healing items on low-value pickups.
- Spending the shotgun in chapter 2. The shotgun is the only weapon that meets the chapter 3 boss damage threshold, and a spent shotgun in chapter 2 is a hard recovery in chapter 3.
- Skipping the save room in chapter 5. The save room is the only one in the chapter that has a storage terminal, and skipping it means the next save room is two encounters away.
- Choosing the ambush route on a first run. The ambush route is balanced for a player who knows the chapter 7 boss, and a first-run player will lose the missing save room without gaining the stat increase.
- Healing during a cutscene. Cutscenes have an invulnerability window, but the window ends before the player can move. Healing during a cutscene wastes the item.
Each mistake has a matching rule in the resource management reference. The walkthrough is built so that following the rules makes the mistakes harder to commit.
Frequently asked questions
Should I follow the chapter order exactly on a first run?
Yes. The chapter order is built around the unlock of the reusable tools in chapter 3, and returning to a chapter 1 room with the chapter 2 loadout costs resources that the player has not yet earned. The walkthrough treats the chapter order as a hard sequence for the first run and relaxes it only on a second run, when the player can choose a different route for the weapon upgrade or the ambush path.
What is the best early loadout to keep in storage?
The best early loadout is one healing item, the handgun, and the spare ammo box. The healing item covers the first scripted encounter, the handgun is the most efficient weapon for the chapter 1 enemies, and the spare ammo box is stored because the chapter 2 puzzle gate is the first place the player needs more than the starting rounds. The walkthrough treats this loadout as the default until the chapter 3 tools unlock.
How do I know when to fight and when to run?
The walkthrough uses three checks. First, the enemy audio cue: a fast cue means the enemy has heard the player and is committed, a slow cue means the enemy is still investigating. Second, the inventory weight: a heavy loadout favors running because the dodge animation is shorter than the recovery animation from a hit. Third, the chapter goal: a chapter that ends in a puzzle gate favors running because the gate does not care how many enemies the player killed on the way.
Are the side areas worth the backtracking cost?
Most side areas are worth the cost because they return a permanent upgrade or a codex entry, and the backtracking cost is paid once. The walkthrough recommends taking the chapter 4 side area on a first run, because the weapon upgrade shortens the chapter 5 boss fight, and skipping the chapter 6 side area on a first run, because the codex entry is cosmetic and the backtracking cost is paid in healing items.
What is the difference between the safe and ambush routes in chapter 6?
The safe route skips the ambush section of chapter 7 and adds an extra save room, while the ambush route adds two scripted encounters and rewards the player with a permanent stat increase. The walkthrough recommends the safe route on a first run and the ambush route on a second run, because the ambush route is balanced for a player who knows where the chapter 7 boss spawns.
How do I deal with the damage threshold bosses?
The damage threshold mechanic punishes weapons that deal damage below a per-shot value, and the threshold drops in the second phase of every threshold boss. The walkthrough recommends the shotgun for the first phase and the handgun or special weapon for the second phase, and warns against using the special weapon in the first phase because the threshold is too high for the special weapon to stagger the boss.
Can I save the special weapon for the final boss?
Yes, and the walkthrough recommends it. The special weapon reaches its damage cap only in the second phase of a boss, and the second phase of the final boss is the longest fight in the game. A spent special weapon in chapter 5 is a hard recovery in chapter 8, because the chapter 8 save room does not respawn the special weapon.
What should I do if I run out of healing items before the chapter save room?
The walkthrough recommends a defensive route. Stop the offensive actions, retreat to the last save room, and deposit any spare items into storage. The storage room is a safer place to hold a healing item than the inventory, and a player who retreats early can finish the chapter with a single heal instead of a run that ends in a game over. The walkthrough treats a retreat as a valid strategy, not a failure mode.
Are the codex entries required to finish the game?
No. The codex entries are cosmetic unlocks that do not change the inventory, the weapons, or the boss fights. The walkthrough recommends collecting the codex entries on a second run, when the player knows which rooms contain the entries and can route through them without backtracking.
What is the best way to learn the map for a speedrun?
The walkthrough recommends three practice runs, each one focused on a different part of the map. The first run learns the chapter 1 to chapter 3 route, the second run learns the chapter 4 to chapter 6 route, and the third run learns the chapter 7 to chapter 8 route. A speedrun is a sequence of small optimizations, and the walkthrough treats each practice run as a separate optimization pass rather than a single full run.


Leave a Reply