
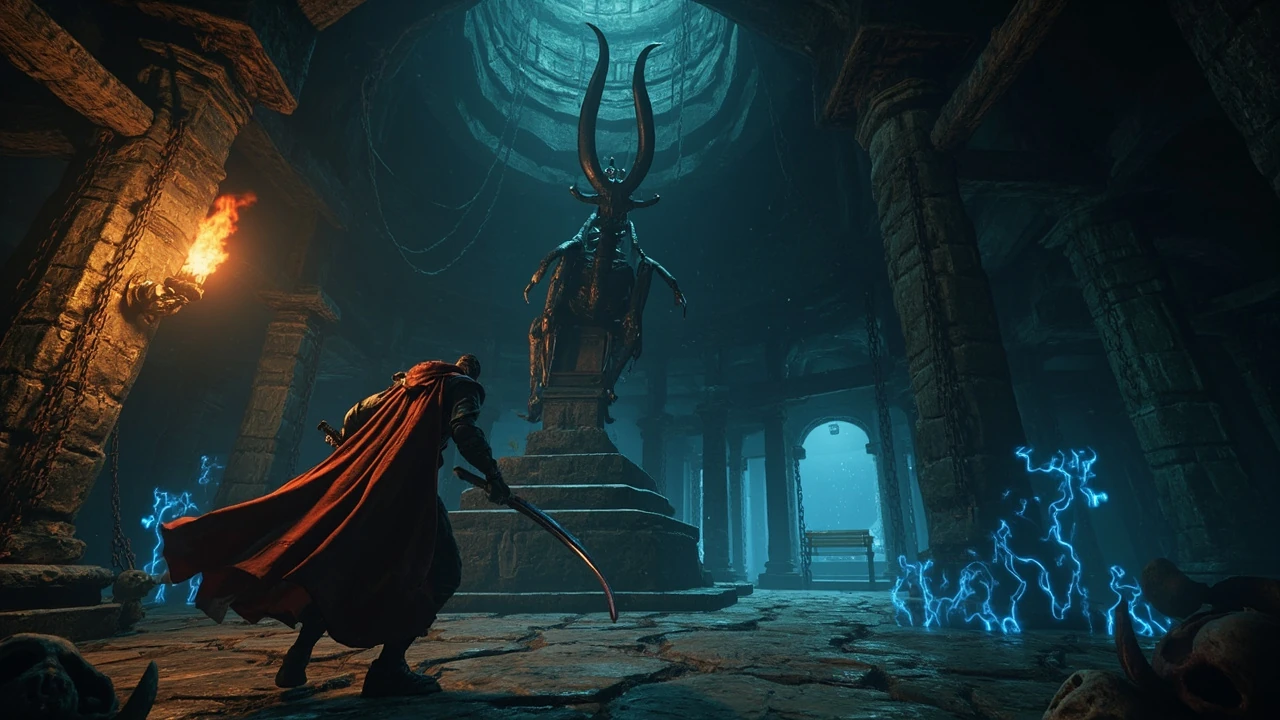
Savage Beastfly boss guide for Hollow Knight: Silksong
The Savage Beastfly is an optional boss in Hollow Knight: Silksong that waits inside the Chapel of the Beast, a side area off the southeast of Hunter’s March. It is one of the first real skill checks many players meet after leaving the Greymoor and Far Fields regions, because the fight mixes close-range punishment, mid-air juggling, and an arena that does not give you much room to breathe. Treating it as an early benchmark rather than a throwaway side encounter is a useful mindset: the patterns you learn here translate directly into later bosses that layer additional enemies and movement on top of the same core loop.
This guide walks through what the Savage Beastfly does, what you need to reach the boss room, and the practical decisions that decide whether you walk away with the reward or burn through your rosaries. It is written for a player who already understands basic Silksong movement, including pogo-bouncing, downward strikes, and the silk-based healing system, and who is trying to plan a build before committing to the climb back up the chapel.
Why the Savage Beastfly matters as a design reference
Even if you are only here for the reward, the Savage Beastfly is a useful fight to study because it bundles several systems the rest of Silksong relies on. It tests:
- Positioning discipline in an arena with a raised central platform and breakable furniture.
- Reading telegraphs that combine a wind-up, a clear audio cue, and a recovery window.
- Tool use, because the encounter frequently summons smaller adds that pressure your heals.
- Resource budgeting, since the chapel is long and the bench in the boss room is trapped.
Players who learn the Savage Beastfly fight tend to carry that confidence into harder optional bosses, where two or three overlapping patterns arrive in the same window. If you are the kind of player who would rather skip a tough optional boss, it is still worth at least entering the room once to see how the encounter sets up its pressure, because the design logic is reused in later areas.
Where the Savage Beastfly lives in the world map
The Savage Beastfly is located inside the Chapel of the Beast, on the eastern side of Hunter’s March. Hunter’s March itself sits south of the main Greymoor hub, and you can only reach the chapel from above, which means you need a specific traversal tool before the area opens up at all.
Prerequisites before you can enter the chapel
You cannot reach the Savage Beastfly on a first pass through Hunter’s March. The path up to the chapel is gated behind movement tools you unlock through earlier quests, and the in-game map is not always honest about which corridors you can actually climb.
- Drifter’s Cloak: a glide ability that lets you ride air currents. This is the key gate for the Chapel of the Beast, and you do not get up to the boss room without it.
- Flexile Spines wish completion: Drifter’s Cloak is granted after finishing the Flexile Spines wish in the Far Fields, which means you need to clear that objective before the chapel route even appears on your mental map.
- A healed bench in Hunter’s March: resting at the bench at the base of the chapel is convenient for retries, but it is also the only respawn point you have if the chapel bench fails you, so plan accordingly.
- Basic tool kit for adds: at least one tool or silk skill capable of clearing smaller enemies. The chapel corridor is full of them, and you do not want to enter the boss room with half a health pool.
Route from Deep Docks to Hunter’s March
Most players who approach Savage Beastfly for the first time come up through Deep Docks rather than through the surface. The Deep Docks entry point is reliable because it gives you a vertical corridor with clear landmarks, and you can usually find a bench partway up to break the climb into two manageable sections.
Once you enter Hunter’s March, look for an air current straight ahead of you. Ride that current up using the Drifter’s Cloak, then spot the platform with a bench sign hanging above it on the left. Land on the platform, step into the room on the left, and you will find a bench. The map does not warn you about this, but that bench is booby-trapped, so do not rest on it without disarming the trap first.
Disarming the chapel bench trap
The bench trap is a small moment of level design that is easy to miss on a first run. It teaches you that Hunter’s March rewards careful exploration over speed, and it gives you a safer respawn point if you take a death or two inside the chapel.
Step-by-step for the trapped bench
- Walk past the bench to the left wall of the small room.
- Find the hidden room on the left wall, which is a normal-looking breakable section rather than a marked doorway.
- Enter the hidden room and look up to find a lever hanging from the ceiling.
- Strike the lever to disarm the trap. The lever swings back into a neutral position once you hit it, and the room becomes safe to use.
- Walk back to the bench and rest to set your respawn point for the chapel.
If you skip the hidden room and rest anyway, the bench explodes. You will take damage, the respawn will not stick, and you will have to clear the corridor again from the previous bench. None of that is fatal, but it is a five-minute tax that you do not need to pay.
Why the trap exists as a design choice
The trapped bench is not just a gotcha. It reinforces two patterns that run through Silksong:
- Every shortcut has a price. Almost every optional bench in the game is gated by a small puzzle, a hidden lever, or an enemy ambush. The chapel is the first place where that pattern costs you a long walk back if you ignore it.
- Exploration is its own reward. The hidden room also tends to contain minor loot, which is how the game trains you to treat suspicious walls as something to check rather than something to walk past.
Once the bench is safe, the rest of the climb to the boss door is short, and you can take a death or two without losing ten minutes of progress.
How to reach the boss door from the bench
After resting, the next step is leaving the bench room and dropping back down into the corridor. This is where many players lose track of the path, because the chapel has a lot of vertical layers and the air currents feel more like a maze than a straight line.
- Exit the bench room and use the Drifter’s Cloak to descend to the bottom of the chamber.
- At the bottom, look for the exit on the right side of the room. Land on the platform while avoiding the red spikes on the floor and ceiling.
- Move through the exit into the next corridor.
- Continue right until you reach a gap that you can glide across with the Drifter’s Cloak.
- On the other side, climb or wall-jump up to the chapel entrance and step through the door into the Savage Beastfly arena.
If the air currents look confusing, slow down and let the Drifter’s Cloak idle. Many of the currents only activate when you are in a specific position, and you can read them more easily from a standstill than when you are already moving.
What the Savage Beastfly actually does in combat
The Savage Beastfly has a small, readable moveset that is harder than it first looks because of the adds. Once you have seen the patterns two or three times, the boss stops being a wall of red and starts being a sequence of decisions.
Core attack patterns
- Forward slam: the boss rears up and slams its head into the ground in front of it. The wind-up is the longest part of the animation, and the safe window is a short hop backward followed by a single pogo strike on the way down.
- Charge across the arena: the boss winds up for a second, then runs across the floor. The clean response is to jump over the charge and use the recovery frames to land one or two needle hits on the back end.
- Summon adds: at certain health thresholds the boss calls in smaller beastfly enemies from the sides of the room. These are the real difficulty spike, not the boss itself.
- Vertical lunge: the boss leaps into the air and tries to come down on top of you. This move opens the cleanest pogo window in the fight if you read the shadow before the boss lands.
How the arena shapes the fight
The Chapel of the Beast arena is roughly rectangular, with a raised central platform and small side pockets. The geometry matters more than it looks:
- The central platform is the safest ground. Standing on it keeps adds from spawning directly on top of you and gives you a clear view of incoming slams.
- The side pockets are the danger zones. Adds tend to crawl out of them, and the boss uses them to bait you into corners where you cannot dodge a charge.
- The ceiling height is just enough for a fully charged Drifter’s Cloak glide, which is what makes the vertical lunge punishable at all.
Recommended build and tool loadout
There is no single required build for the Savage Beastfly, but the encounter punishes builds that rely on long combos or slow heals. The fight rewards fast, mobile kits that can clear adds in one or two hits.
Tool categories that work well here
| Tool category | Why it helps | When to use it |
|---|---|---|
| Short-range burst damage | Cleans up adds before they pressure your heals | When the boss steps back to summon |
| Vertical mobility | Keeps you above the slam and charge hitboxes | During recovery windows after a charge |
| Soul/utility tools | Generates silk for healing without committing to long combos | Between phases when the boss is briefly still |
| Defensive parry or shell | Shrugs off the vertical lunge if your timing slips | Only when your other tools are on cooldown |
Sample loadout to consider
If you want a baseline to tune from, this is a sensible default loadout for players who have not already committed to a specialized build:
- Primary: a fast needle weapon that lets you weave two or three hits between boss attacks without locking you into long animations.
- Tool slot one: a short-cooldown add-clear tool, ideally something that hits in a small AoE so it can pick off two adds at once.
- Tool slot two: a mobility or parry tool that can be used reactively if a slam catches you out of position.
- Silk skill: a healing skill with a quick cast time, so you can top off between phases without losing ground to the adds.
If you are running a slower, more committed build, accept that you will have to play more passively. Stay near the central platform, let the adds come to you, and use your heavy hits only on the boss while the adds are off-screen.
Combat strategy, phase by phase
The Savage Beastfly fight has three rough phases based on health, and each one asks for a different priority. The actual transition is not always marked, but the patterns shift noticeably as the boss loses health.
Phase one: opening pressure
The opening is the easiest part of the fight, and the goal is to learn the telegraphs without spending resources. The boss will mostly use the slam and charge, and it will not yet call adds.
- Stay near the central platform and bait the forward slam.
- After the slam, land one or two needle hits and back off to read the next move.
- Do not commit to long combos. The boss recovery is shorter than it looks, and the charge can punish greed.
- If the boss does a vertical lunge, pogo off the head and use the height to reset your position.
Phase two: adds change the math
Around half health, the boss starts summoning smaller enemies. This is where most deaths happen, not because the boss gets harder, but because the adds eat the windows you were using to heal.
- Prioritize the adds first. One add on top of you during a slam is the most common cause of a lost run.
- Use your add-clear tool the moment the boss steps back, rather than waiting for the adds to walk toward you.
- Move toward the side pockets only if you can clear them quickly. Standing in the middle is safer than chasing adds into corners.
- Save your healing for the moment after an add dies, when the boss is briefly still.
Phase three: the desperate finish
In the final third, the boss mixes the slam, charge, and lunge faster, and it can summon a second wave of adds before the first wave is fully dead. This is the phase where you stop trying to be perfect and start trying to be efficient.
- Commit to damage only after a slam. The recovery is the longest consistent window.
- If you are low on silk, prioritize a clean hit on an add over a flashy hit on the boss. Keeping yourself alive is the actual win condition.
- Do not chase the boss across the arena. Let it come to you near the central platform.
- If you die, the bench is right there. There is no shame in burning two or three attempts to learn the phase three rhythm.
Common mistakes and how to avoid them
Most failed attempts on the Savage Beastfly fall into a small number of patterns. If you are stuck, the fastest fix is usually to change one specific habit rather than to rework your entire build.
Mistakes that cost the most attempts
| Mistake | Why it hurts | Cleaner habit |
|---|---|---|
| Resting on the chapel bench without disarming | Wastes time and health, and your respawn does not stick | Always check for a hidden room or lever before sitting |
| Ignoring adds in phase two | Adds cancel your healing and bait you into corners | Clear adds the instant the boss summons them |
| Chasing the boss across the arena | Makes charges and slams harder to read | Stay near the central platform and let the boss come to you |
| Healing during an active attack | Cancels your cast and often eats damage | Heal only after a clean add clear or a slam recovery |
| Spending all silk on offense | Leaves you no way to top off between phases | Keep at least one full silk spool for emergency healing |
What you get for winning the fight
The Savage Beastfly drops a reward tied to the chapel’s theme, and it unlocks a fast-travel and respawn network that makes the rest of Hunter’s March much less painful. Even if you are not interested in the lore, the practical payoff is significant.
- Reward drop: a usable item that integrates with the broader tool system rather than a one-off consumable, which means the win keeps paying off in later areas.
- Respawn access: with the bench disarmed, the chapel becomes a useful checkpoint for any future content added to the area.
- Map knowledge: the climb through the chapel teaches you a routing pattern that repeats in harder optional zones.
- Skill benchmark: a clean kill is a reliable signal that your build is ready for the next tier of optional bosses.
How the Savage Beastfly compares to other early bosses
Within the early-to-mid game set, the Savage Beastfly sits in a specific difficulty slot. It is harder than the early gate bosses that teach you the basic combat loop, but easier than the late-act optional bosses that layer multiple patterns at once.
| Aspect | Savage Beastfly | Early gate boss | Mid-game optional boss |
|---|---|---|---|
| Moveset size | Small but punishing | Two or three simple patterns | Large and layered |
| Adds | Yes, mid-fight | No | Yes, often at every phase |
| Arena complexity | Multi-level chapel with a trapped bench | Flat arena with one landmark | Hazards, pits, and dynamic elements |
| Healing pressure | Moderate, add-driven | Low | High |
| Recommended attempts | Two to five on a tuned build | One or two | Five or more, often with build changes |
Planning a run if you are undergeared
If you have stumbled into the chapel without the right tools, the smartest play is to leave, finish a few side objectives, and come back rather than brute-forcing the fight. The Savage Beastfly punishes unprepared players harder than almost any other early optional boss.
Side objectives that pay off before a retry
- Clear nearby wish lines: a few short wishes in the same region will hand out rosaries and small items that translate into extra tools and upgrades.
- Unlock a new bench: an extra respawn closer to the chapel cuts the cost of every failed attempt.
- Upgrade your needle: if you have the shards for a tier-up, do it before the fight. The damage difference between a freshly upgraded weapon and a baseline weapon is the difference between two clean phases and a long, sloppy one.
- Refill silk spools: the chapel sells silk-related items, and a single refill can convert a near-miss into a clear.
Reading the boss like a designer
If you enjoy reverse-engineering how a fight works, the Savage Beastfly is a small but clean case study. Each system in the room is teaching you a different thing, and once you can name the teaching goal, the patterns click.
- The trapped bench teaches you to verify shortcuts before you commit to them.
- The air current climb teaches you that traversal tools are a hard requirement, not a convenience.
- The adds teach you that optional encounters in Silksong are not duels. They are pressure tests with multiple actors.
- The slam and charge teach you that recovery windows are real, but only if you let them be.
Players who frame the fight as a single duel tend to lose to the adds. Players who frame it as a positioning puzzle with a duel stapled onto it tend to clear it in a handful of attempts. That mental shift is worth more than any single tool swap.
When to skip the Savage Beastfly
There is no shame in skipping an optional boss. The Savage Beastfly is not a route-locking encounter, and you can come back to it later with a stronger build, more tools, and a better sense of the combat loop.
- If you are under four masks of health and have no healing silk skill, the adds will eat you before the boss even enters phase two.
- If you have not unlocked Drifter’s Cloak, the chapel is literally unreachable, and you need to finish the Flexile Spines wish first.
- If you are chasing the main story and have limited play time, the chapel is optional and the reward is not required for progression. Bookmark it and move on.
- If you are stuck on a specific pattern, take a break and replay a familiar area. Fresh hands read telegraphs more cleanly than frustrated hands.
Quick checklist before you walk into the boss room
Before you commit to the climb, run through this short list. If any item is missing, the cost of a failed attempt will be much higher than the cost of five minutes of prep.
- Drifter’s Cloak is unlocked and equipped.
- Flexile Spines wish is complete.
- The chapel bench trap is disarmed.
- You have at least one add-clear tool in your loadout.
- Your silk spool is full, and you know which skill you will use to heal.
- Your needle is upgraded to the current tier available in the region.
- You have a recent bench set in Hunter’s March as a fallback respawn.
Frequently asked questions
Where is the Savage Beastfly in Hollow Knight: Silksong?
The Savage Beastfly is inside the Chapel of the Beast, on the eastern side of Hunter’s March. You reach the chapel by climbing an air current from the main Hunter’s March corridor, and you need the Drifter’s Cloak to make the climb. The boss sits at the top of the chapel, behind a short corridor and a breakable wall.
Do I need the Drifter’s Cloak to fight the Savage Beastfly?
Yes. The path up to the Chapel of the Beast is gated behind the Drifter’s Cloak, and you do not get past the air current without it. The cloak is granted after completing the Flexile Spines wish in the Far Fields, so finish that quest before you try to reach the chapel.
Why does the bench in the chapel explode?
The bench in the Chapel of the Beast is booby-trapped. If you rest on it without disarming the trap, it explodes and damages you, and your respawn does not stick. Walk past the bench, find the hidden room to the left, strike the lever hanging from the ceiling, and the bench becomes safe to use.
Is the Savage Beastfly a required boss?
No. The Savage Beastfly is an optional boss. You can finish the main story without ever entering the Chapel of the Beast, and you will not be locked out of any required content. The reward is useful for the rest of Hunter’s March and for future optional content, but it is not on the critical path.
What is the best strategy against the Savage Beastfly?
Stay near the central platform, bait the forward slam, and land one or two needle hits during the recovery. When the boss starts summoning adds, clear them immediately rather than chasing them into the side pockets. Save healing for the moment after an add dies, and do not commit to long combos, because the charge punishes greed.
What tools work best against the Savage Beastfly?
Short-range add-clear tools, vertical mobility tools, and a quick-cast healing skill are the most reliable loadout. A defensive parry or shell tool is a good fallback if your timing slips on the vertical lunge. Slower, more committed builds can work, but they have to play passively and wait for the boss to come to the central platform.
How many attempts does the Savage Beastfly usually take?
On a tuned build, two to five attempts is a normal range. Players who skip the trapped bench or ignore the adds tend to take more, because the hidden bench trap adds a long walk back to every death. Players who come back later with a fully upgraded needle often clear the fight on the first or second try.
What do I get for beating the Savage Beastfly?
The fight drops a usable reward tied to the chapel’s theme, and it gives you a safe respawn point inside the chapel once the bench trap is disarmed. The reward integrates with the broader tool system, so it keeps paying off in later areas. The chapel itself becomes a useful checkpoint for any future content added to the region.
Can I fight the Savage Beastfly without healing silk?
You can, but the add phase makes healing much harder, and you will probably need to play very passively. If you are missing a healing skill, consider clearing a couple of nearby wishes first to unlock one, or come back later when you have more tools available. Forcing the fight without a heal plan is the most common reason for long, frustrating attempts.
What should I do if I keep dying in phase two to the adds?
If the adds are the problem, the fix is almost always habit-based rather than build-based. Stop chasing adds into the side pockets, clear them the moment the boss summons them, and use the add clear as your cue to heal rather than your cue to chase. If the habit change does not work, swap in a faster add-clear tool or a defensive parry, and try again.


Leave a Reply