
Vault of Vengeance in Crimson Desert: how the dungeon works and what to expect
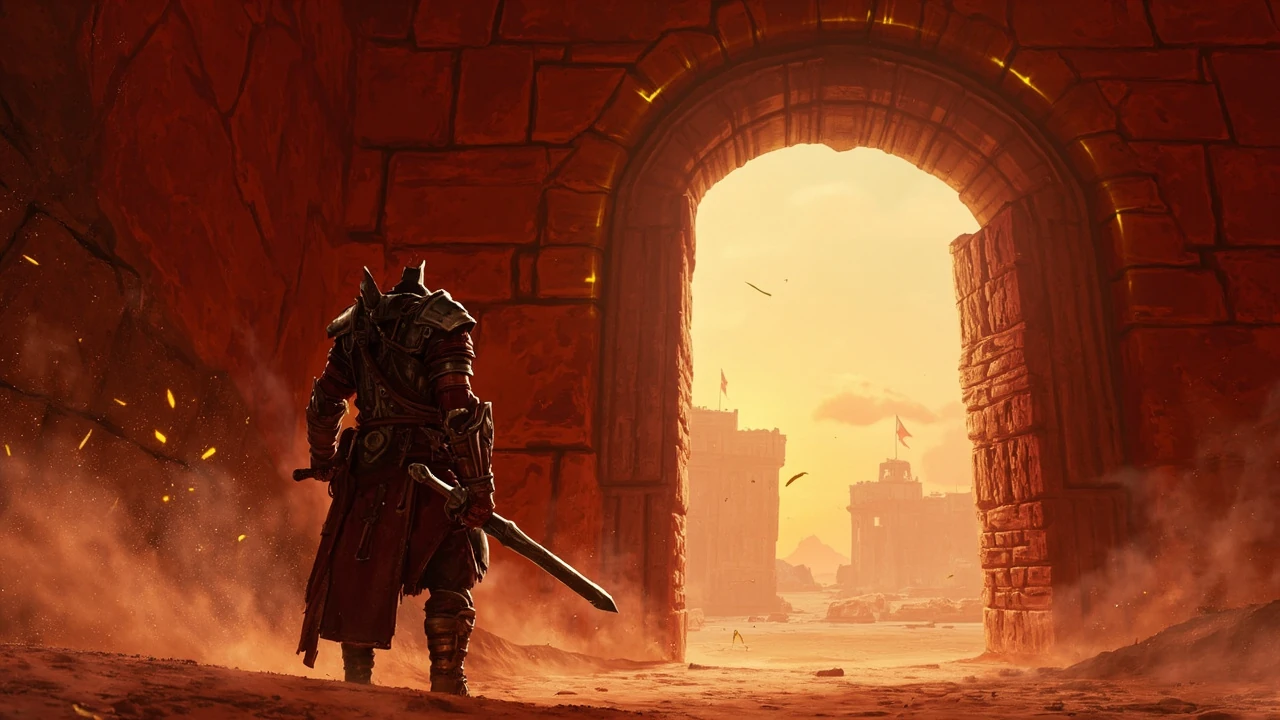
The Vault of Vengeance is one of the high-tier dungeon experiences threaded into Crimson Desert’s open-world structure, and the first time a player sees its iron-bound entrance, the design language is already telling a story. The architecture borrows from the same Pailwa desert ruins scattered across the overworld, but the vault reads as older, more deliberate, and more hostile. A short stone corridor gives way to vaulted chambers lit by braziers and a thin red light that filters through cracks in the ceiling. This guide walks through how the dungeon is structured, what kinds of encounters it throws at players, how loot and rewards are tuned, and how a developer-minded reader can read the encounter design as a case study in pacing, encounter chaining, and difficulty signaling.
The article assumes a reader who has either pushed through the main campaign or is planning a focused end-game run. The focus is practical: what to bring, what to expect from enemy behavior, where the checkpoints sit, and which combat patterns reward preparation over reflexes. The vault is best understood in the context of the systems around it, not in isolation, so the broader world context and a hands-on impression of how the wider game plays at launch are worth keeping in mind while reading.
What the Vault of Vengeance actually is
The Vault of Vengeance is a self-contained dungeon space inside Crimson Desert designed for a single coordinated party of three to six players, depending on the matchmaking mode selected at the entrance. It is not a procedurally generated map. It is a hand-authored set of rooms with fixed geometry, fixed enemy placements, and fixed reward tables, which is important for a player who wants to learn the encounter rather than survive a random roll. The dungeon sits in the upper tier of the end-game content, between story-anchored lairs and the open-world raid-scale events that unlock later.
From a production standpoint, the dungeon is a useful illustration of how a development team can treat a hand-authored space as a difficulty vector. Every encounter is a deliberate choice, every reward drop is positioned to extend the run in a specific direction, and every checkpoint is placed to test whether the player has internalized the previous room’s lesson. A player who tries to brute-force the vault will usually stall on the third major encounter, and a player who ignores the dungeon’s audio cues will routinely walk into a heavy swing they could have sidestepped.
Entry requirements and prerequisites
Before the vault’s entrance will activate, the player’s character must meet a small set of conditions. None of them are hidden, but several are easy to misread on first approach, so it helps to lay them out clearly.
- The character must have completed the main story chapter that unlocks the southern Pailwa region, because the vault’s entrance is gated behind that progression flag.
- The character must be at or above the recommended level range for the dungeon, otherwise the entrance will trigger a warning prompt rather than a clean entry.
- Party matchmaking requires at least one player with the dungeon key item, which is acquired through a short repeatable quest in a nearby settlement.
- Equipment durability must be above a soft threshold; gear that is heavily damaged will warn the player at the entrance, because the dungeon is not designed to be a repair-free experience.
Those four checks are not unique to the vault. They are a pattern Crimson Desert uses across its high-tier content: a story gate, a level gate, an item gate, and a preparation gate. The combination keeps casual players from wandering in unprepared while still leaving the door readable for anyone who has paid attention to the surrounding quest chain.
Dungeon layout and pacing structure
The vault is laid out as a linear sequence of seven combat rooms, separated by two safe chambers that function as checkpoints and one short corridor that serves as a transition zone. The pacing follows a familiar pressure curve: a short warm-up, a mid-difficulty test, a spike, a brief rest, a second spike, a longer encounter, and a final multi-phase boss. The first safe chamber sits between room three and room four, and the second sits between room five and room six. Both chambers have a stash, a repair station, and a campfire-style object that the team can use to regroup.
The transition corridor between the second safe chamber and the boss arena is intentionally longer than it needs to be. It functions as a cooldown period, both for combat cooldowns and for player tension. The corridor is also where the dungeon’s audio design shifts. Music fades, ambient wind picks up, and the player’s footsteps become more audible. From a design language point of view, this is a quiet signal: stop rushing, check your resources, and prepare for a multi-phase fight.
One practical note for first-time runners: the safe chambers are not the only places to pause. The transition corridor has small alcoves where a single player can step out of line of sight to repair a weapon or drink a slow-acting healing item, but those alcoves are tight and they will not protect the full party. Treat them as a personal cooldown, not as a checkpoint.
Enemy types and encounter design
The vault’s enemy roster is drawn from a small pool of mid-to-high-tier factions that the player has already encountered in the overworld, but their behaviors are tuned harder here. Crowd control, attack telegraphs, and stagger windows are not new, but the timing windows are tighter, and the enemies are arranged to punish lone-wolf behavior.
There are four enemy archetypes that recur through the dungeon, and a fifth that is reserved for the final boss. Understanding how they work is more useful than memorizing the room order, because the same patterns repeat with different combinations.
- Heavy infantry: slow, high-damage, telegraphed swings. The intended counter is a sidestep followed by a short punish window. They are placed in pairs so that a player who dodges one swing can be caught by a second swing from the partner.
- Skirmishers: fast, low-health, designed to flank. They are usually placed at the edge of a room to encourage the party to control space rather than chase kills.
- Crossbow sentries: ranged, positionally anchored, with a wind-up sound cue. They are the dungeon’s primary “did you read the room” test, because the wind-up audio is the cue to break line of sight before the shot lands.
- Vengeful wraiths: a hybrid type that mixes mid-range melee with short teleports. They are the dungeon’s stagger test. Their teleport has a short wind-up animation, and a well-timed heavy attack during the wind-up will interrupt the teleport and open a punish window.
The boss type is unique to the dungeon and is not encountered anywhere else in the open world. The encounter is built around a phase system rather than a single damage race, which is why the long transition corridor matters. The boss is a study in how a hand-authored encounter can use phase transitions as a pacing tool: each phase introduces a new mechanic, removes an old one, and reframes the arena.
A useful detail for party leads: the four archetypes are not random in their placement. Heavy infantry almost always anchor the front of a room, skirmishers ring the edges, crossbow sentries take a raised or recessed position, and wraiths appear in the back third of a room. Reading that layout before engaging is the single biggest predictor of a clean first pull.
Loot tables and reward design
The vault uses a layered reward system. Each cleared room drops crafting materials and small equipment upgrades, the safe chambers grant a passive buff that lasts for the rest of the run, and the final boss drops a curated set of high-tier items plus a small chance at a signature piece. The signature piece is the most interesting reward from a design point of view, because its drop chance is intentionally low and is not affected by party size. It is a long-term chase reward rather than a guaranteed payout.
The table below breaks down the reward structure by checkpoint. It is written from observed behavior patterns, because the game’s official documentation treats some of the percentages as approximate. Treat the percentages as a guide rather than a contract.
| Reward tier | Trigger | Drop type | Approximate frequency |
|---|---|---|---|
| Crafting materials | Per cleared room | Region-specific resources | Every room, guaranteed |
| Equipment upgrades | Per cleared room | Rare and uncommon gear pieces | Two to four per room |
| Safe-chamber buff | Reaching a safe chamber | Stackable combat buff | Once per chamber |
| Boss loot | Defeating the final boss | Curated high-tier gear set | Every clear, full set |
| Signature piece | Defeating the final boss | Unique named item | Low single-digit percent |
The signature piece is worth calling out separately because it is the vault’s long-tail reward. A team that runs the dungeon weekly for a few months is still likely to see the signature piece only a handful of times, which keeps the dungeon relevant as a destination rather than a one-time trophy.
One detail that often gets missed: the per-room drops are not pulled from a single shared pool. Each room has a small themed pool, so the materials a player gets from room one are usually more useful for early-campaign crafting, while the materials from the later rooms feed directly into the curated boss loot set. That is why players who skip rooms to rush the boss often feel under-geared for the encounter, even when their personal item level is technically high enough.
Combat tactics that actually work
The vault rewards preparation over improvisation, but it also rewards players who read the room quickly. Three tactical patterns come up repeatedly in successful runs, and they are worth learning before the first attempt rather than after the third failed clear.
First, control the entrance. Most of the dungeon’s rooms are designed with a chokepoint, even if it does not look like one at first glance. A heavy infantry at the front of a room, a skirmisher at the side, and a crossbow sentry on a raised platform is a common arrangement. The intended counter is to clear the entrance chokepoint first, then push inward, rather than to rush toward the ranged enemy and let the melee types collapse on the party from behind.
Second, listen for the wraith teleport. The wraith’s teleport has a distinct audio cue, a short rising tone, that plays about a second before the teleport resolves. That second is the entire punish window. A player who is tracking the audio can stagger the wraith during the wind-up, which removes the teleport and opens a short window for safe damage. A player who is not tracking the audio will eat the teleport and lose half their health bar in a single hit.
Third, use the safe chambers as intended. The safe chamber buff is not a minor bonus; it is a meaningful damage and survivability boost that scales the player’s effectiveness for the rest of the run. A team that skips the first safe chamber to rush the boss is not playing optimally, even if they have the raw damage to clear the encounter. The buff is part of the intended power curve, and ignoring it is the same as ignoring a difficulty setting.
There is also a fourth pattern that experienced runners tend to adopt without being told: stagger management. The dungeon’s heavy enemies have a stagger meter that is shorter than it looks, and a coordinated party that chains staggers can lock a heavy infantry in place for several seconds. That window is long enough to drop a wraith, reposition for a crossbow line-of-sight break, and reset the frontline. Most failed runs are not failed by raw damage; they are failed by losing the stagger rhythm.
How the vault reads as a design case study
For a developer-minded reader, the vault is a clean illustration of how a hand-authored dungeon can teach its own mechanics through space and audio rather than through tutorial pop-ups. There is no NPC in the dungeon who explains the wraith stagger window. The player is expected to learn it from the audio cue, the failure state, and the death of a party member. There is no on-screen indicator that says “this is a chokepoint.” The player is expected to read the geometry and recognize the pattern from earlier encounters in the overworld.
The pacing is also worth studying. The vault’s seven-room structure is not arbitrary. It is the minimum number of rooms that allows a clear pressure curve without forcing the player into a long, drawn-out experience. The two safe chambers are placed at the points where the pressure curve peaks, which is why skipping them feels bad. The transition corridor is placed where a cooldown is needed, which is why it feels slow without being frustrating.
From a production perspective, the vault is also a useful study in how a small enemy roster can carry a long dungeon. The same four archetypes appear in every room, but their combinations, positions, and behavior tweaks change the experience each time. That is a deliberate constraint, not a limitation. It means the development team can tune the dungeon’s difficulty by adjusting a small number of variables, which is much easier to balance than a large, unique enemy roster.
Common failure modes and how to avoid them
Most failed vault runs come down to a small set of recurring problems. A team that can recognize the pattern can usually fix it within a single run, which is part of the dungeon’s design intent. The table below summarizes the most common failure modes, their symptoms, and the tactical correction that addresses them.
| Failure mode | Observable symptom | Likely cause | Suggested correction |
|---|---|---|---|
| Front-loaded wipes | Party collapses in room two or three | Chokepoint ignored, melee types collapsing from behind | Clear entrance first, then push inward |
| Wraith one-shots | Player loses half health from a single hit | Wraith teleport audio cue missed | Track the rising-tone cue, heavy attack during wind-up |
| Crossbow burst-downs | Player killed before reaching cover | Line of sight broken too late | Break line of sight at the start of the wind-up sound |
| Boss phase reset | Wipe at the start of phase two | Transition corridor skipped, cooldowns not reset | Use the transition corridor as a deliberate cooldown period |
| Resource starvation | No healing items for the final rooms | Safe chamber buffs skipped | Take the safe chamber buff at every checkpoint |
Each of these failure modes is a designed lesson. The dungeon is not trying to be unfair; it is trying to teach the player how to read its cues. A team that learns to read the cues will clear the vault consistently. A team that tries to brute-force it will keep wiping on the same encounter until they adapt.
One failure mode that is not in the table because it is harder to diagnose: the silent soft-wipe. A team that clears the dungeon but takes a long time to do it, and finishes with most of the party below a third of their health, has almost always failed a stagger rotation somewhere in the middle rooms. The damage is not visible on the final scoreboard, but the encounter rhythm is broken, and the next run will usually end in a hard wipe if the rhythm is not rebuilt.
Party composition and role responsibilities
The vault does not enforce a role system, but it does reward a balanced party. A team of three heavy melee fighters can clear the dungeon, but they will have a harder time with the crossbow sentries and the wraith phases. A team of three ranged specialists can clear it, but they will struggle with the heavy infantry chokepoints. The intended party is a mix of roles, with each player covering a different responsibility.
In practice, a successful party composition usually looks like this:
- One frontline player who controls the chokepoint and absorbs the heavy infantry pressure.
- One skirmisher player who flanks, peels wraiths, and breaks line of sight for the crossbow sentries.
- One support player who tracks cooldowns, manages healing items, and calls out the wraith audio cue.
Six-player matchmaking follows the same logic at larger scale, with two players per role rather than one. The vault does not reward a stack of damage dealers, and it does not reward a stack of tanks. It rewards a team that can read the room and respond to the cues in a coordinated way.
Role labels in the vault are also fluid. A player who is comfortable on the frontline can peel wraiths if the support player is pinned by crossbow fire, and a support player can take over chokepoint control if the frontline player is staggered. Treating the role as a job description rather than a fixed identity is the difference between a party that adapts and a party that does not.
How the vault fits into the wider end-game loop
The vault is not a standalone experience. It is one of several high-tier destinations in Crimson Desert’s end-game loop, and it is positioned to be a weekly or bi-weekly run rather than a daily grind. The signature piece drop rate is tuned to support that cadence, and the curated boss loot is meaningful enough to be worth chasing but not so powerful that it trivializes the rest of the game’s content.
From a production perspective, the vault’s role in the end-game loop is to give players a reason to revisit a hand-authored space. Procedural content can carry daily engagement, but it cannot carry the kind of deliberate, learned encounter design that the vault offers. The dungeon is the game’s answer to the question of how a live-service title can offer a curated experience without losing the replayability of a randomized one.
For a reader who wants to know where the vault sits in the wider loop, the rough order is: open-world clearing and story progression first, then the story-anchored lairs that unlock after the southern Pailwa region, then the vault and a small handful of similar hand-authored dungeons, and finally the open-world raid-scale events that unlock once the curated gear sets are mostly complete. The vault is the midpoint, not the end.
Developer notes: what the vault teaches about encounter design
For a reader who is building or tuning a dungeon of their own, the vault is a useful reference for three specific design choices. First, the audio-first cue design. The wraith teleport, the crossbow wind-up, and the boss phase transitions all rely on audio cues rather than visual indicators. That is a deliberate accessibility choice, and it is also a pacing choice, because audio cues scale better with distance than visual effects.
Second, the layered reward system. The vault uses a four-tier reward structure: guaranteed per-room drops, guaranteed per-chamber buffs, guaranteed per-clear boss loot, and a low-percentage signature piece. That layering is what allows the dungeon to feel rewarding on every run while still offering a long-term chase.
Third, the pacing curve. The seven-room structure, the two safe chambers, and the transition corridor are not arbitrary. They are the minimum viable structure for a pressure curve that includes two spikes, two rests, and a cooldown. A dungeon with fewer rooms cannot support that curve, and a dungeon with more rooms dilutes it. The vault is a clean example of how a small number of well-placed rooms can carry a full experience.
There is also a less obvious fourth lesson: the vault teaches that hand-authored content benefits from being readable. Every room has a clear front, side, and back; every enemy archetype has a fixed role; every reward tier has a fixed trigger. A dungeon that hides its structure behind procedural variation loses the readability that makes the vault work, even if it gains replayability in the short term.
What to bring and how to prepare
Preparation is the single biggest factor in a successful vault run. The list below is the standard loadout that experienced players bring to the dungeon, and it is worth treating as a starting point rather than a fixed recipe.
- A repaired main weapon and a repaired sidearm. Durability matters more in the vault than in the open world, because the dungeon’s repair stations are limited.
- A full stack of healing items, split between fast-acting and slow-acting types. The fast-acting type is for wraith one-shots; the slow-acting type is for the boss phases.
- A stack of stagger items, which are useful for interrupting wraith teleports and for breaking heavy infantry guard states.
- One buff consumable for each safe chamber, to extend the safe-chamber buff into the next room.
- A clear voice-comm setup. The vault is a coordinated experience, and the wraith audio cue is much easier to call out than to track in isolation.
A team that brings that loadout and uses it deliberately will clear the vault consistently. A team that improvises the loadout will clear the vault eventually, but they will spend more time in the safe chambers than they need to.
One last preparation note: the vault’s entrance is far from the nearest fast-travel point, and the path between the fast-travel node and the entrance is a long run through hostile overworld. Players who arrive at the entrance with half their cooldowns already spent will start the run at a disadvantage. The recommended approach is to fast-travel to the nearest settlement, clear any local aggro, and only then walk to the entrance.
Limitations of this guide and what to verify in-game
This article is written as a guide rather than a contract. The exact drop rates, level recommendations, and reward tables are tuned by the development team and can change with patches. The encounter patterns described here are based on the dungeon’s design language, but specific numbers, exact percentages, and individual drop chances should be verified in-game before any run is planned around them. Treat the structure as a guide, treat the percentages as approximate, and treat the cues as the most reliable element of the encounter.
If a patch changes the dungeon’s behavior, the patterns above are likely to stay roughly the same, but the numbers will shift. The vault’s design intent, which is to teach the player to read the room and respond to the cues, is the part of the experience that is least likely to change. The numbers are the part of the experience that is most likely to be tuned. Keep that distinction in mind when planning a run.
Frequently asked questions
What level should my character be before entering the Vault of Vengeance?
The vault’s recommended level range is the upper tier of the end-game content, which is well above the main campaign’s level cap. A character that is below the recommended range will trigger a warning prompt at the entrance, and the encounter tuning will feel punitive. A character at the recommended range will find the encounters challenging but fair. A character that is above the recommended range will find the encounters manageable but not trivial, because the vault’s difficulty is anchored to the encounter design rather than to raw stat scaling.
Can the vault be soloed, or is a full party required?
The vault is designed for a coordinated party of three to six players, and the encounter design assumes a team that can cover multiple roles. A solo player can clear the dungeon with a high-skill build, but the run will be significantly longer and the failure rate on the boss phases will be higher. The dungeon does not enforce a party size at the entrance, but the intended experience is a coordinated run rather than a solo clear.
How often can the signature piece drop, and is it affected by party size?
The signature piece drops from the final boss at a low single-digit percentage rate, and that rate is not affected by party size. Running the dungeon in a larger party does not increase the drop chance, and it does not decrease it. The signature piece is a long-term chase reward rather than a guaranteed payout, and it is designed to be a multi-month chase for a regular player.
What happens if my party wipes in the vault?
A wipe resets the party to the most recent safe chamber, with a small durability penalty on equipped gear. The party does not lose the boss loot or the safe-chamber buffs that were already collected, but the per-room drops from the rooms that were cleared after the last safe chamber are lost. A wipe is not a full reset, but it is a meaningful setback, and it is the dungeon’s primary difficulty signal.
Are there any secret rooms or hidden encounters in the vault?
The vault does not contain secret rooms in the traditional sense, but it does contain a small number of optional side encounters that are tucked into the geometry of the transition corridor and the safe chambers. These side encounters are not required for completion, and they are tuned to be optional challenges for a team that wants extra reward rolls. They are not flagged on the map, and they are intended to be discovered by exploration rather than by guide.
Does the vault scale with player count or stay fixed?
The vault’s encounter tuning stays fixed across party sizes, with the exception of a small number of breakpoints where the enemy count is adjusted to keep the encounter readable. The damage numbers do not scale with party size, and the reward drops do not scale with party size. The vault is designed to be the same experience whether it is cleared by three players or six.
Can the safe-chamber buff be stacked across multiple checkpoints?
Yes, the safe-chamber buff is stackable, and a team that takes the buff at every checkpoint will carry the full stack into the boss arena. The buff is not lost on death, and it is not lost on a wipe that resets the party to a safe chamber. The intended use is to take the buff at every checkpoint, and a team that skips a safe chamber is giving up a meaningful damage and survivability boost.
Is the vault worth running more than once?
The vault is designed to be a repeatable destination rather than a one-time trophy. The curated boss loot is a meaningful upgrade path, the signature piece is a long-term chase, and the per-room drops are useful for crafting. A team that runs the dungeon weekly will see a steady stream of upgrades, and a team that runs it bi-weekly will still see meaningful progress. The vault is one of the more rewarding repeatable experiences in the end-game loop.
How does the vault compare to the other end-game dungeons in Crimson Desert?
The vault sits in the middle of the end-game dungeon roster. It is harder than the story-anchored lairs that unlock first, but it is not the hardest content in the game; the open-world raid-scale events that unlock later are tuned higher. The vault’s specific role is to teach the player the audio-cue and chokepoint patterns that the later content also relies on, so clearing it consistently is a useful prerequisite for the harder end-game destinations.

Leave a Reply