
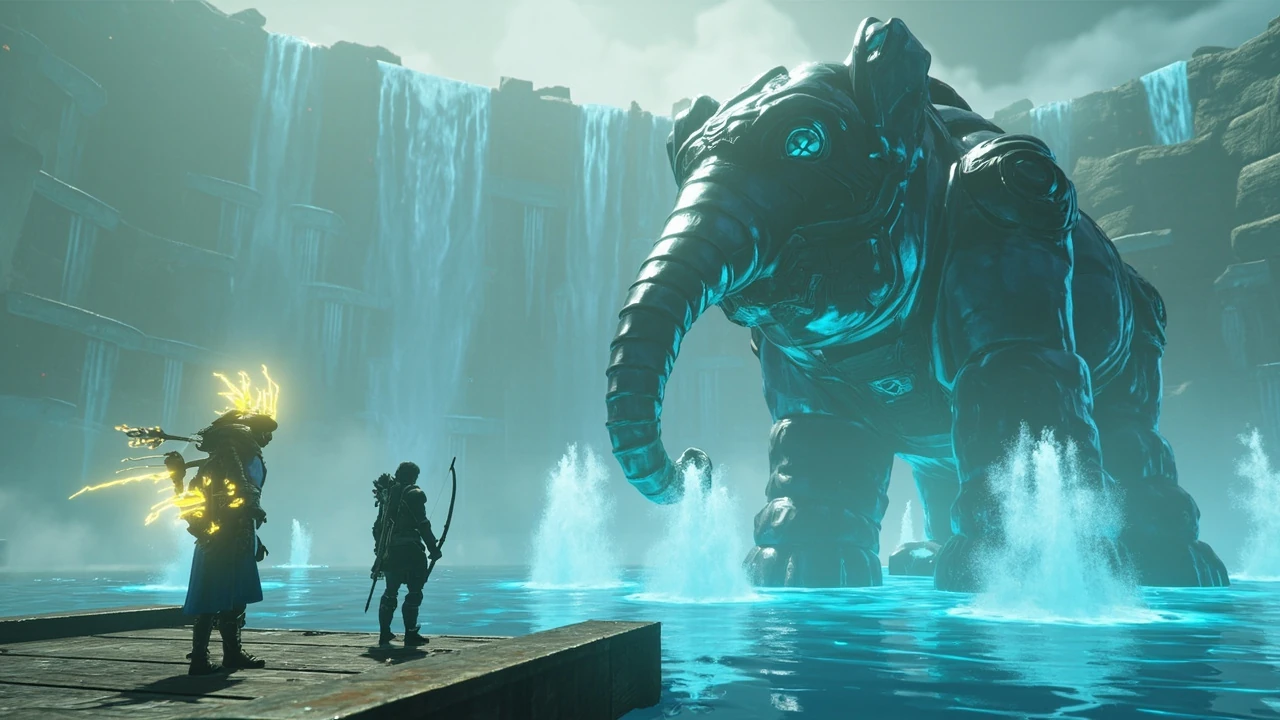
Divine Beast Vah Ruta walkthrough
The first time you look up at Divine Beast Vah Ruta from the docks of Zora’s Domain, the whole machine looks like a problem disguised as a sculpture. An elephant-sized construct of polished metal stands knee-deep in a reservoir, its long central trunk spraying four thick columns of water high into the air, and each column is what is keeping the rainstorm on the domain alive. Sidon is already at the dock waiting, and the route up to this point has already cost you a Zora armor set, a side detour for a Lynel photograph, and at least a few broken weapons. From here the mission is simple to describe and very particular in practice: gather twenty shock arrows without dying, board the beast, rotate the trunk to put out the rain, work through four terminals, and free the champion Mipha from a hundred years of Ganon’s corruption.
This walkthrough focuses on the player decisions that actually matter, not just the route. The order is forgiving in most areas, but several gates will quietly block you if you walk in unprepared, and the terminals are easier when you understand the map system before you start spinning the trunk around. Read the first section for the preparation list, then move into the arrow run, then the boarding fight, and finally the dungeon itself.
What you should have before you start
Before you go anywhere near the east gate, take a few minutes to check your inventory and your equipment. The Zora quest line gives you a generous amount of help, but it also sends you up against one of the strongest overworld enemies in the early game.
- Zora armor set (helm, tunic, greaves) for the swim speed bonus, the ability to swim up waterfalls, and the spin attack while swimming.
- At least one weapon with reasonable reach for Lynel fights, in case stealth fails and you have to commit.
- Several bows, because the arrow run and the boarding section both burn through them quickly.
- Food or elixirs that restore multiple hearts, since both the Lynel and the boarding fight can chunk your health bar.
- A fire weapon or a flame arrow, because the Lynel on the summit is a red-maned variant and ice weapons will be punished by the cold modifier at the top of the mountain.
- The Cryonis, Magnesis, and Stasis runes unlocked on the Sheikah Slate, since all three are used in the dungeon.
If the Zora greaves quest from Laflat has not been completed, finish it before you leave. The greaves complete the swim speed bonus and unlock the spin attack, and that spin attack is the difference between catching a shock arrow underwater and watching it drift past you.
How to get twenty shock arrows from Ploymus Mountain
Once Sidon and Muzu have finished their argument about Mipha, the plan is to lure a fearsome Lynel off the top of Ploymus Mountain and strip its lair of shock arrows. You do not have to fight the Lynel. In fact, a frontal fight at this point in the game is almost always a losing trade in weapons and health, and the quest is set up so that stealth is the intended approach.
Route up the east waterfall
Leave Zora’s Domain through the east gate on the second-floor bridge and turn left at the signpost toward Mikau Lake. The path climbs through a series of small waterfalls that your Zora armor lets you swim straight up. At the top of Mikau Lake you reach Lulu Lake, and from there a final climb takes you to Ploymus Mountain. On the way up, the path passes several trees that have shock arrows lodged in them. Pick those up as you go, because the arrow counter resets if you fast travel and some of them respawn on a long timer.
Approaching the Lynel
The red-maned Lynel patrols the open summit near Shatterback Point. It will detect you from a long distance, and once it has aggro it will begin firing volleys of three shock arrows each that are nearly guaranteed to one-shot you. The opening cutscene is your cue to break line of sight behind a boulder or a tree, not to draw your bow.
The reliable approach is to crouch behind cover and let the Lynel lose interest, then circle the perimeter in a low crouch, picking up arrows from the trees and rocks on the edges of the arena. The summit is shaped so that you can keep the beast in view through gaps in the rock while you move between cover positions, and you should never close the last gap until the Lynel is facing away from you.
Arrow sources on the summit
There are more than twenty shock arrows scattered around the top of the mountain if you search carefully. The quest only needs twenty, but a small buffer helps when the boarding sequence eats two or three in the first volley. The approximate distribution of arrows around the summit is summarized in the table below.
| Location | Approximate shock arrows | Risk level |
|---|---|---|
| Two arrows in a tree on the left, just above the waterfall | 2 | Low |
| One arrow in a tree further up the path | 1 | Low |
| One arrow lodged in a tree beside the signpost near the summit | 1 | Low |
| Scattered around the rocks on the edge of the arena | 6-8 | Medium |
| Shatterback Point, the peak above the Lynel’s patrol route | 4-6 | High |
| Loot from the Lynel itself if you choose to fight | 10+ plus a powerful bow | Very high |
When you have at least twenty arrows, climb to Shatterback Point to pick up the last few before you jump down into the reservoir. There is a bed at the docks if your hearts are low, and that is also where you can hand Laflat the Lynel photo if you completed the side quest earlier. Turning the photo in gives you the Zora greaves and finishes the armor set.
Boarding Vah Ruta with Sidon
Speak to Sidon at the docks and he will let you hop on his back. From there, the boarding sequence is a short but very specific escort section. Sidon swims around the perimeter of the beast, watching for openings in the rain, and you use Cryonis to destroy the ice blocks that the beast launches at you while you wait for a chance to fire.
Defending against the ice attacks
Vah Ruta opens with floating ice blocks that glide toward you across the water. You can shoot them out of the air with a bow or break them with a heavy melee weapon, but the fastest and safest method is the Cryonis rune. Cryonis destroys the ice blocks instantly and at range, which means you can stay on Sidon’s back and keep your bow drawn. If you let one hit you, it will respawn a few seconds later, and the cycle keeps going until you clear it.
Taking out the four pink orbs
Once the ice is under control, Sidon will pull you close to one of the four waterfalls spraying out of the beast’s trunk. A pink orb sits just under the lip of each waterfall. You have a brief window to dismount, glide upward with the paraglider, and fire a shock arrow into the orb before the next volley of ice cuts you off. Two orbs must be destroyed in the first pass; the remaining two are reachable in a second pass after the beast adds spiked ice balls to the mix.
Spiked ice balls arc in from behind you, which feels disorienting the first time it happens. The trick is to glance over your shoulder regularly and break them as soon as they enter your peripheral vision. Cryonis handles them as well as it handles the cubes, and a quick bow shot works in a pinch.
| Phase | Defensive mechanic | Recommended counter | Targets to hit |
|---|---|---|---|
| Phase 1, opening | Floating ice blocks traveling forward | Cryonis rune or quick bow shots | None yet, stay on Sidon |
| Phase 1, first pass | Same ice blocks plus close approach to a waterfall | Cryonis to clear, then glide and fire | Two pink orbs |
| Phase 2, second pass | Adds spiked ice balls that arc from behind | Cryonis or look over your shoulder and snipe | Two remaining pink orbs |
| End of boarding | All four orbs destroyed, rain stops | Glide down to the entrance platform | None, dungeon entrance revealed |
When the last orb pops, Vah Ruta’s rainstorm cuts out and the entrance platform rises out of the reservoir. Activate the waypoint before you go inside, because you will be able to fast travel back here later and you will want to leave the dungeon to resupply between terminals.
Inside the beast: map system and the first terminal
The interior of Vah Ruta looks like a flooded metal cathedral. Blight, the living corruption that fills the Divine Beasts, coats the floors in a slow-damage ooze and blocks several passages until you clear it by shooting the eyes hidden inside. Mipha’s voice will speak to you through the Sheikah Slate, and that is the cue to deal with the first Guardian Scout, then look for the eye lurking in the water to the right of the blocked gate.
Reading the beast map
Once the eye is destroyed and the gate is opened with a Cryonis pillar, the Guidance Stone gives you an unusual upgrade to the Sheikah Slate: a 3D model of the entire beast, with your position and the four terminals marked on it. The same map interface lets you rotate the trunk of the beast to one of several preset positions, which is the only way to solve some of the later rooms. The first thing to do in any room is to check the map, because most of the puzzles in this dungeon are really about which direction the trunk is facing.
First terminal, in the entry chamber
Look in the pool just past the Guidance Stone to spot a chest submerged under the water. Drag it out with Magnesis for an Ancient Spring, then move to the corner where the Guardian Scout was killed. The first terminal is underwater in that corner, mounted on a crank that you can manipulate with Magnesis. Lift the terminal until it breaks the surface, then activate it to register the first of four.
Second terminal, the gear room
Head out onto the side of the beast opposite the entrance, climb the slope, and enter the upper floor. A second Guardian Scout guards the doorway and is best handled with a quick flurry before the room becomes a puzzle. The room is dominated by a large vertical gear turned by a stream of water falling from above. A terminal is visible inside the gear, but it rotates with the mechanism, which means it is moving too fast to interact with directly.
Stopping the water fountain
Hop onto the back of the water paddle and ride it up, then paraglide from the top of the gear onto the platform behind the fountain. There is a chest here with a hundred rupees, which is worth taking. Back on the gear floor, the solution is to use Cryonis to plug the fountain itself, which stops the wheel and parks the terminal near the bottom of the rotation. Walk over and activate it before the water pressure builds back up and the gear resumes spinning.
Third terminal, the upper wheel
Exit through the next balcony and climb the slope. Another patch of blight guards the entrance, and this one spawns skeletal heads from a maw in the wall. Clear the heads and find the eye in the wall to remove the blight entirely, then enter the wheel room.
This wheel does not have a water fountain turning it. Instead, you have to supply your own water. Open the map interface, rotate the trunk so that it points at the top of the room, and execute the command. Water sprays in from the roof, spins the wheel, and you stop it again with Cryonis the moment a chest on the rim lines up with a flat surface. Open the chest for the dungeon reward and use the Stasis rune on the top block to launch it into the air, which is the only way to reach the next level.
Fourth terminal and the main control unit
The fourth terminal is on the same route as the main activation unit, which is the room with the heart container at the center. The fastest way to handle the back half of the dungeon is to check the map and rotate the trunk so that the next required platform lines up with where you need to be, then move through the beast as if you were walking through a slowly turning building.
Fighting Waterblight Ganon
When all four terminals are activated, the main control unit in the lowest chamber unlocks. Activating it summons Waterblight Ganon, the boss shaped like a tall, spear-wielding construct that splits into two during the second phase. The fight is built around ranged combat and the Cryonis rune, and the dungeon practically hands you the answer by having water on every surface.
- Phase 1, Waterblight Ganon is a tall spear user that teleports around the room and launches a column of ice when you are far away.
- Phase 2, the boss splits into two copies. Each copy can be damaged normally, but the real one flashes red when struck.
- The Cryonis rune blocks the spear throws and the ice pillars, which is why the fight feels almost unfair in the player’s favor if you remember to use it.
- When both copies are down, the boss collapses and the heart container appears at the back of the chamber.
Activating the main control unit also frees Mipha. The game cuts to a short scene in which Mipha’s spirit heals Link and grants him Mipha’s Grace, a cooldown that revives you once with full hearts if you fall in combat. The blessing is permanent for the rest of the playthrough, which is the real reward beyond the heart container.
What Vah Ruta changes for the rest of the run
Freeing Mipha does more than give you a heart container. It unlocks the next Divine Beast quest, changes what happens at the Zora throne room, and gives you a top-tier combat fallback. The table below summarizes the practical differences between before and after the quest.
| Aspect | Before Vah Ruta | After Vah Ruta |
|---|---|---|
| Rain at Zora’s Domain | Constant, blocks several NPCs and side quests | Cleared, Zora’s Domain returns to its normal layout |
| Heart containers from Divine Beasts | 0 of 4 | 1 of 4 |
| Combat blessing | None | Mipha’s Grace, a one-time revive on a long cooldown |
| Lynel arrows and gear on Ploymus | Risk vs reward because respawns are slow | Same, but you now have a reason to return for stock |
| Next story quest | Locked behind Vah Ruta | Yunobo of Goron City and Divine Beast Vah Rudania |
The rainstorm is the most underrated change. With the sky clear, vendors in the domain open back up, the shrine near the throne room becomes accessible, and the side quest about the photographer at the inn continues normally. The whole area breathes differently, and a lot of players report that the cleared version of Zora’s Domain is the version they remember most strongly.
Common failure modes and how to avoid them
Most first attempts at this quest fail for the same handful of reasons, and most of them come from underestimating either the Lynel or the boarding sequence. The list below covers the patterns that show up most often in player reports and in the IGN Vah Ruta walkthrough itself.
- Engaging the Lynel directly on the first visit, which burns weapons and arrows faster than the rest of the dungeon recovers them.
- Forgetting the Cryonis rune during the boarding sequence, which forces a long, dangerous bow duel with the ice blocks.
- Failing to check the map interface before solving a room, which makes the trunk puzzles feel random when they are actually a single command.
- Ignoring blight in the corridors, which means the slow damage adds up while you solve a puzzle and you do not realize how low your health is.
- Walking into Waterblight Ganon with depleted weapons, which turns a forgiving fight into a long, drawn-out mess.
For a deeper reference on the boarding fight and the arrow run, the Divine Beast Vah Ruta page on IGN’s Breath of the Wild wiki is a useful cross-check, especially if you want to confirm which arrows respawn after a blood moon. If you want a step-by-step companion piece for another quest chain that has a similar arrow-gathering loop, the Hogwarts Legacy Daedalian keys guide on Morvexa Games covers a different kind of collectible hunt with a similar pattern of preparation, retrieval, and unlock.
What to do next after freeing Mipha
With Mipha’s Grace in your pocket and one heart container lighter in terms of remaining challenges, the natural next step is the next Divine Beast. The game nudges you toward Yunobo in Goron City and the Divine Beast Vah Rudania, but there is no real time pressure. The map is wide open, the four terminals in Vah Ruta are repeatable for resupply, and the boarding platform is now a fast travel point that lets you come back whenever you want to restock shock arrows without having to face the Lynel again.
For a player guide that also includes a chapter-by-chapter route through a different kind of dungeon crawl, the Indiana Jones and the Great Circle walkthrough on Morvexa Games covers a comparable mix of exploration, puzzle rooms, and boss fights from a different genre.
Take the time to clear the surrounding shrines, finish the Lynel photo quest, and explore the cleared Zora’s Domain at your own pace before the next beast calls. The way the game is paced, every Divine Beast is a small chapter, and Vah Ruta is the one that teaches you the systems the next three will assume you already know.
Frequently asked questions
Do I have to fight the Lynel on Ploymus Mountain?
No. The quest is designed around stealth and arrow gathering. If you stay crouched behind rocks and keep the Lynel in view through gaps in the cover, you can collect more than twenty shock arrows without ever pulling your weapon. A frontal fight is possible, but it costs you weapons, health, and arrows that are harder to replace than they are to find around the summit.
What happens if I run out of shock arrows during the boarding sequence?
You can leave the boarding fight and return to the docks. The arrows on Ploymus Mountain respawn on the standard overworld timer, so a quick return trip is usually enough to restock. If you want to avoid the back-and-forth, pick up the extra arrows at Shatterback Point before you jump down to the reservoir.
Can I board Divine Beast Vah Ruta before I have the Zora armor?
No. The Zora armor is required to swim up the waterfalls on the way to the reservoir, and the quest is gated behind a conversation in the throne room that only happens once you have accepted Sidon’s help. The armor set is the practical prerequisite for the entire chain.
How many terminals are inside Vah Ruta?
Four terminals, one in each major room. Each terminal is a puzzle of its own, and the map interface is the only way to solve the trunk-based puzzles. The main activation unit in the lowest chamber unlocks once all four are activated, and that is the room where Waterblight Ganon appears.
Is there a way to keep Mipha’s Grace after the quest ends?
Mipha’s Grace is a permanent blessing for the rest of the playthrough. It does not stack with itself and it has a long cooldown, but it revives you with full hearts once each time it comes back up. There is no way to remove it without starting a new file, and most players treat it as a safety net for the rest of the game.
Does freeing Mipha change the ending of the game?
It changes the scene in Zora’s Domain and the credits sequence, and it counts toward the four Divine Beasts you need to free before challenging Ganon. It does not lock the game into a specific ending by itself; the ending depends on how many Divine Beasts you have freed and how much main quest you have completed before the final fight.
Can I return to the dungeon after I free Mipha?
Yes. The waypoint stays active, and you can fast travel back to the entrance whenever you want. The dungeon is mostly empty after the boss fight, but it is a useful restock point for arrows, a quiet place to fight the remaining blight, and a quick way to get back to the reservoir if you want to refight Waterblight Ganon for practice.
What is the easiest way to deal with Waterblight Ganon?
Use the Cryonis rune to block the spear throws and the ice pillars, focus fire on the real copy that flashes red when struck, and keep a strong bow in your hands for the second phase. The boss is built around a player who remembers to use Cryonis, and the fight becomes a formality once the rune is in your rotation.

Leave a Reply